How I Use AI for Article Header Photos
If I’ve said it once, I’ve said it a thousand times….
AI is a confusing and sometimes scary technology, especially with all the slop and garbage people generate. Sometimes that is from immature and poorly designed models; other times it’s from people not knowing how to best use it. But as somebody who comes from tech, I know it’s a tool that, when properly utilized, can be an amazing accelerator. The key is to not assume it’s an easy button that will do your job for you, and to know when and how to use it.
If you’re following me on Instagram, you’ll see that I add the “AI Info” label on some of my photos. That’s because those photos are modified with AI, and being a habitual rule follower, I ensure they are properly identified as such. Good AI relies on good ethics, and ethically, you should identify when you use AI.
So why use AI?
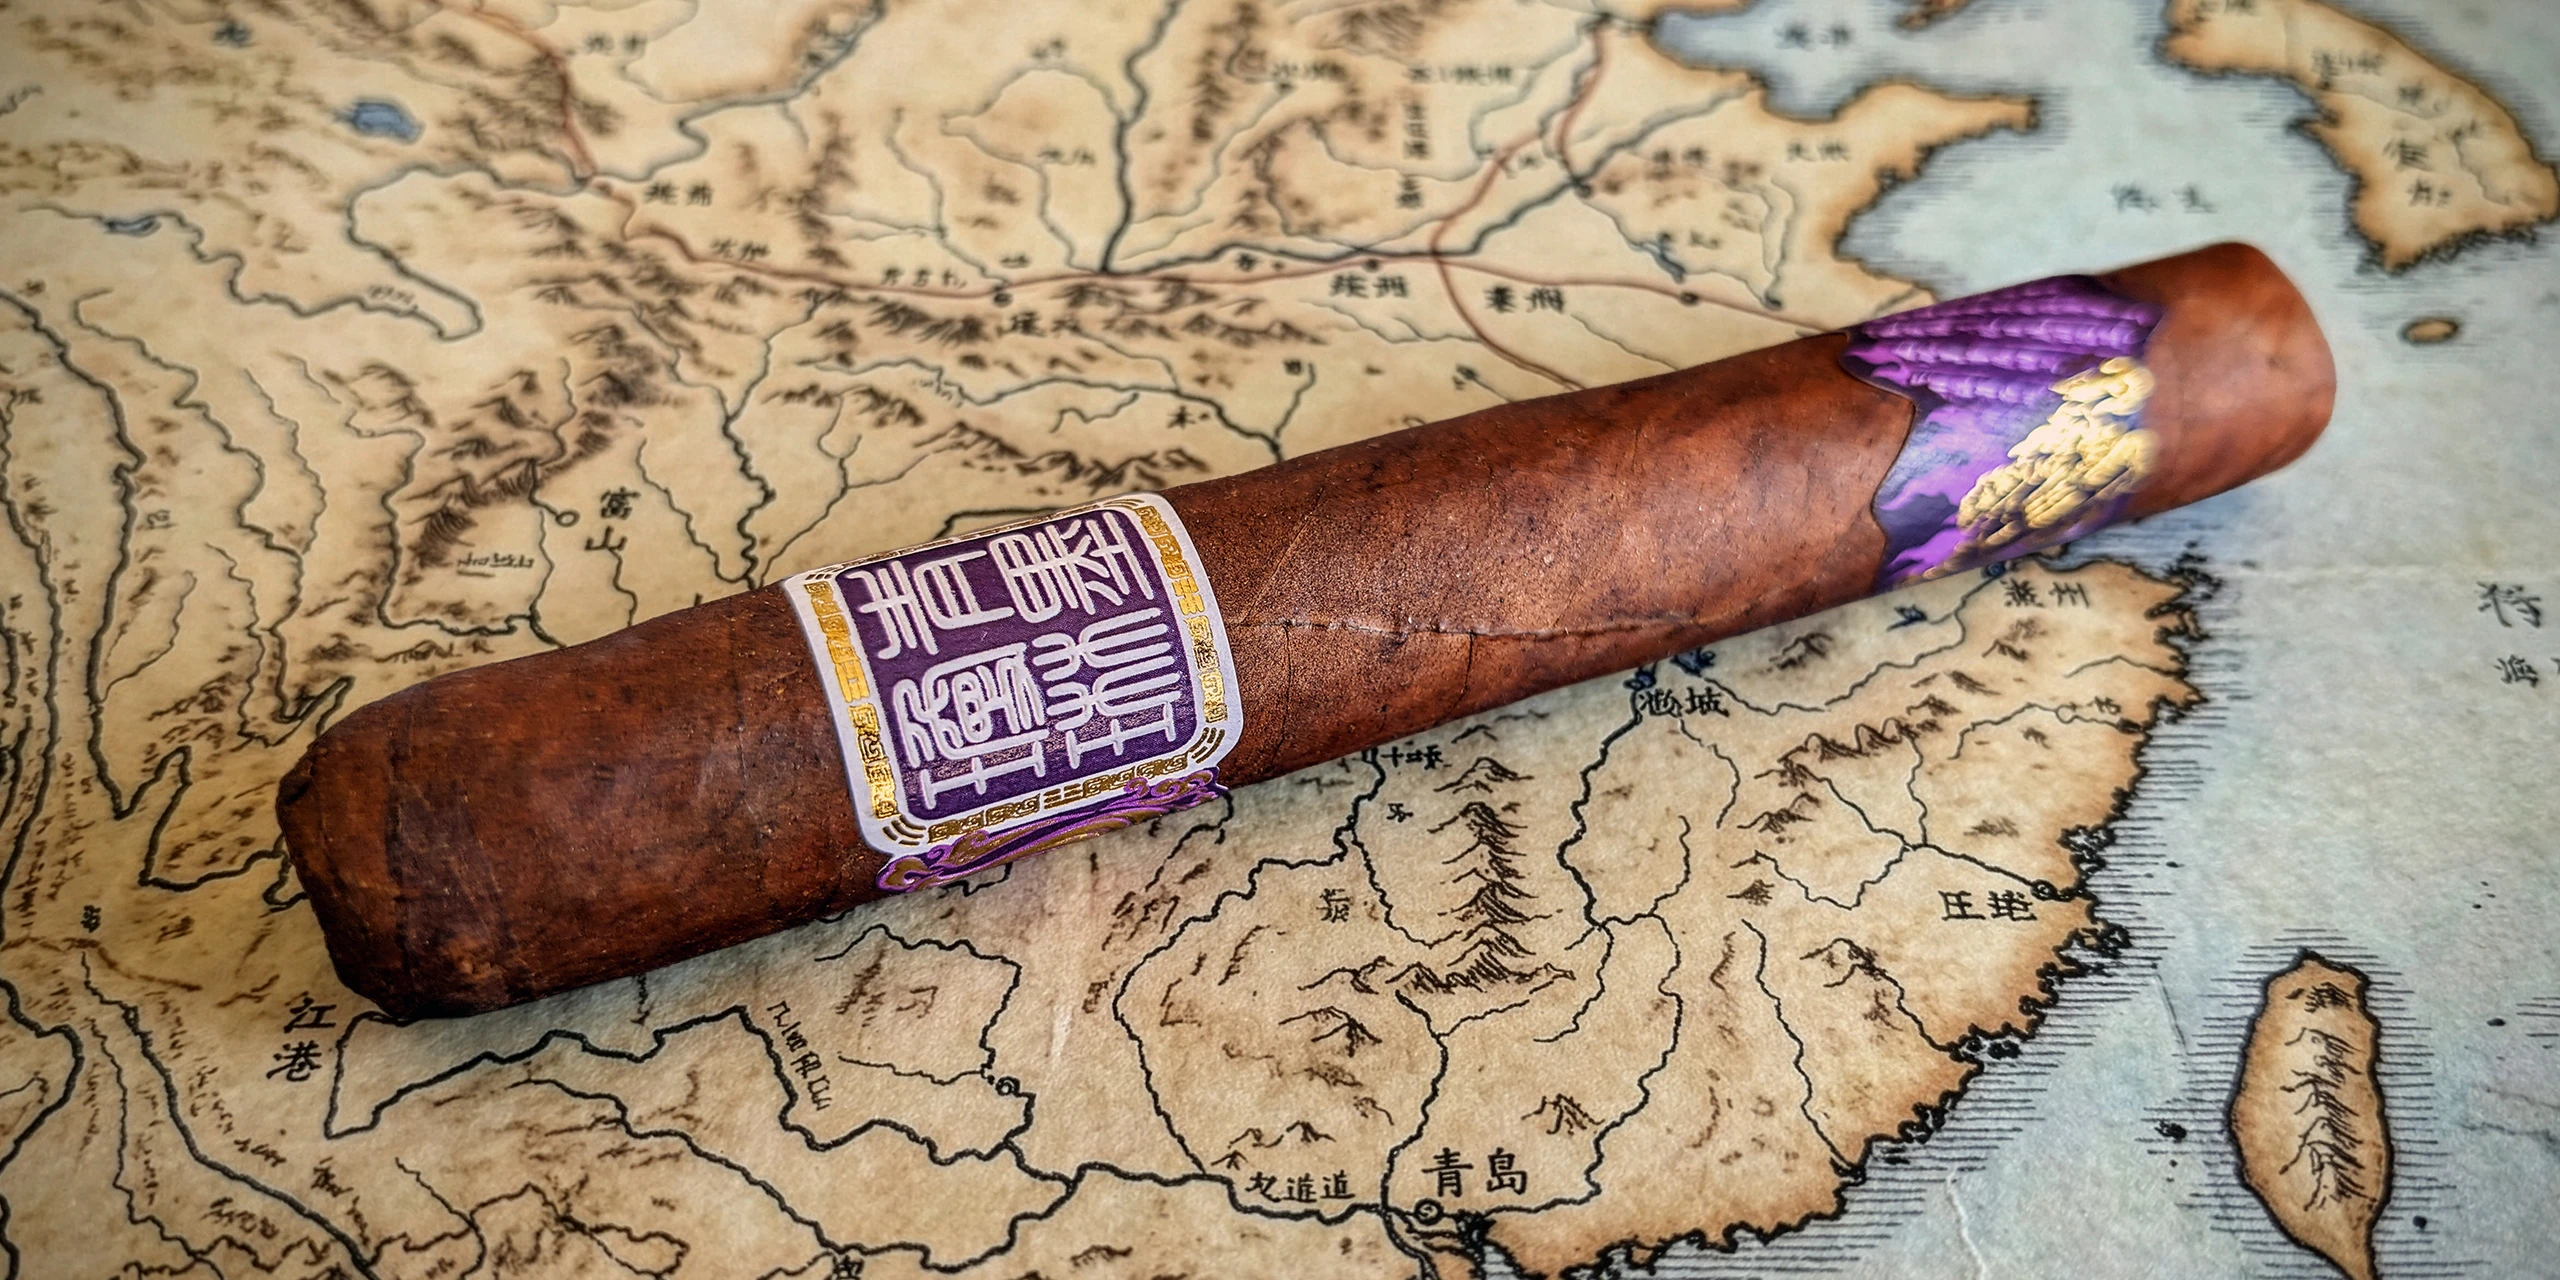
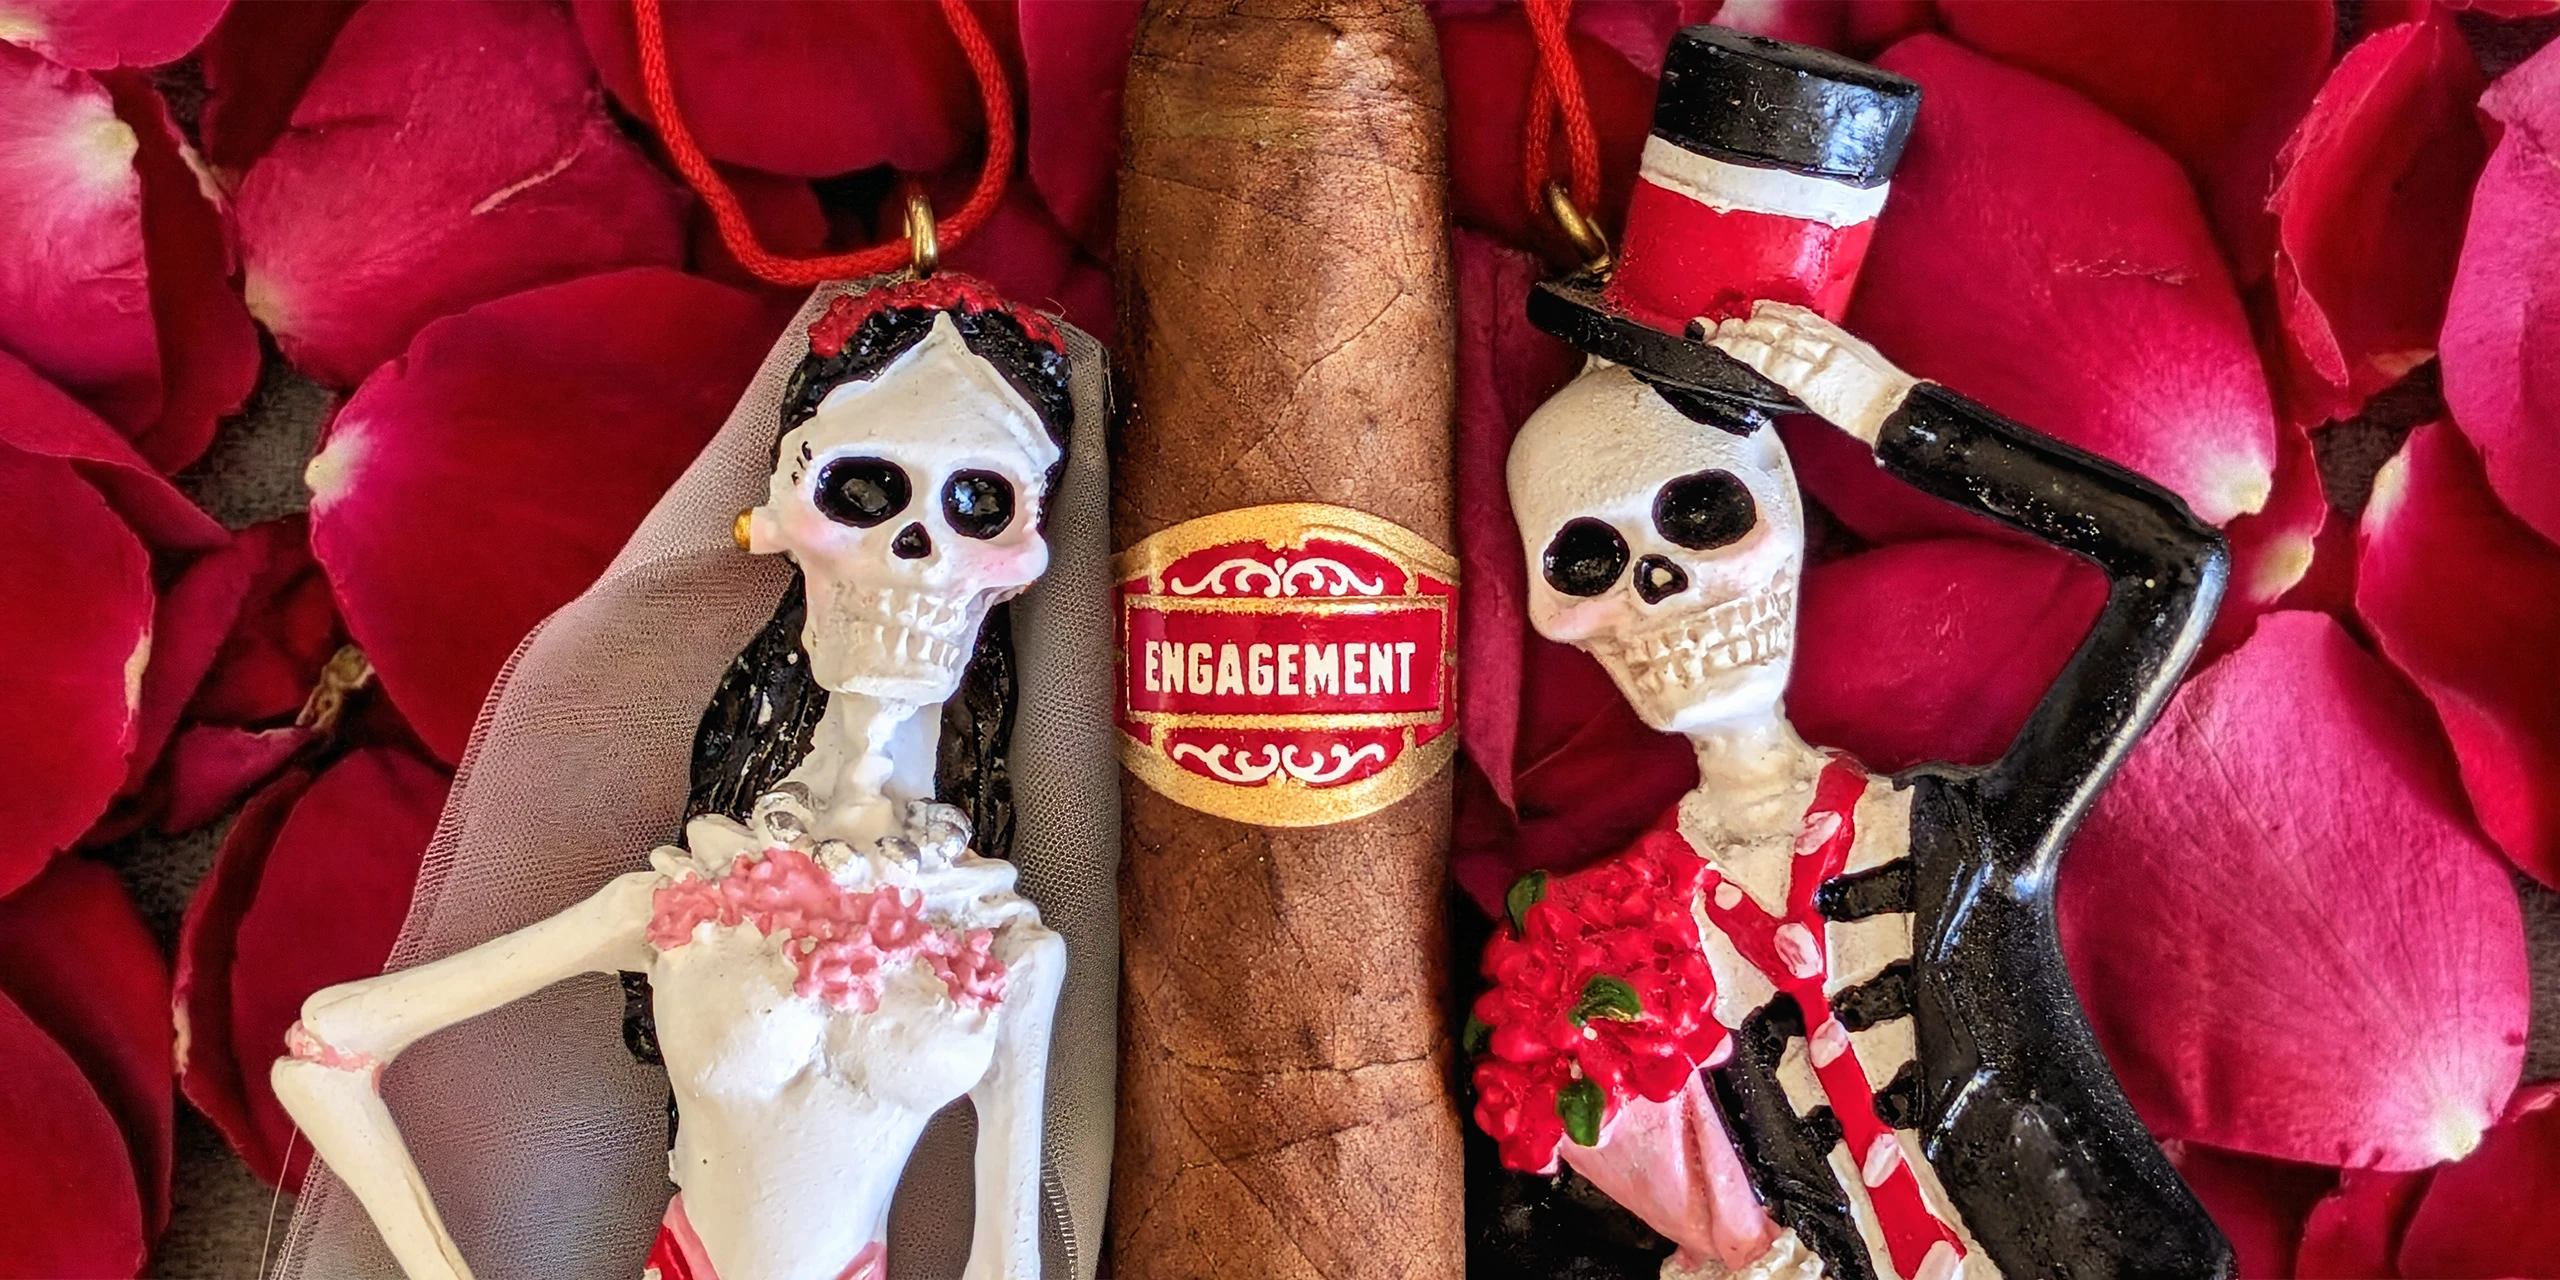
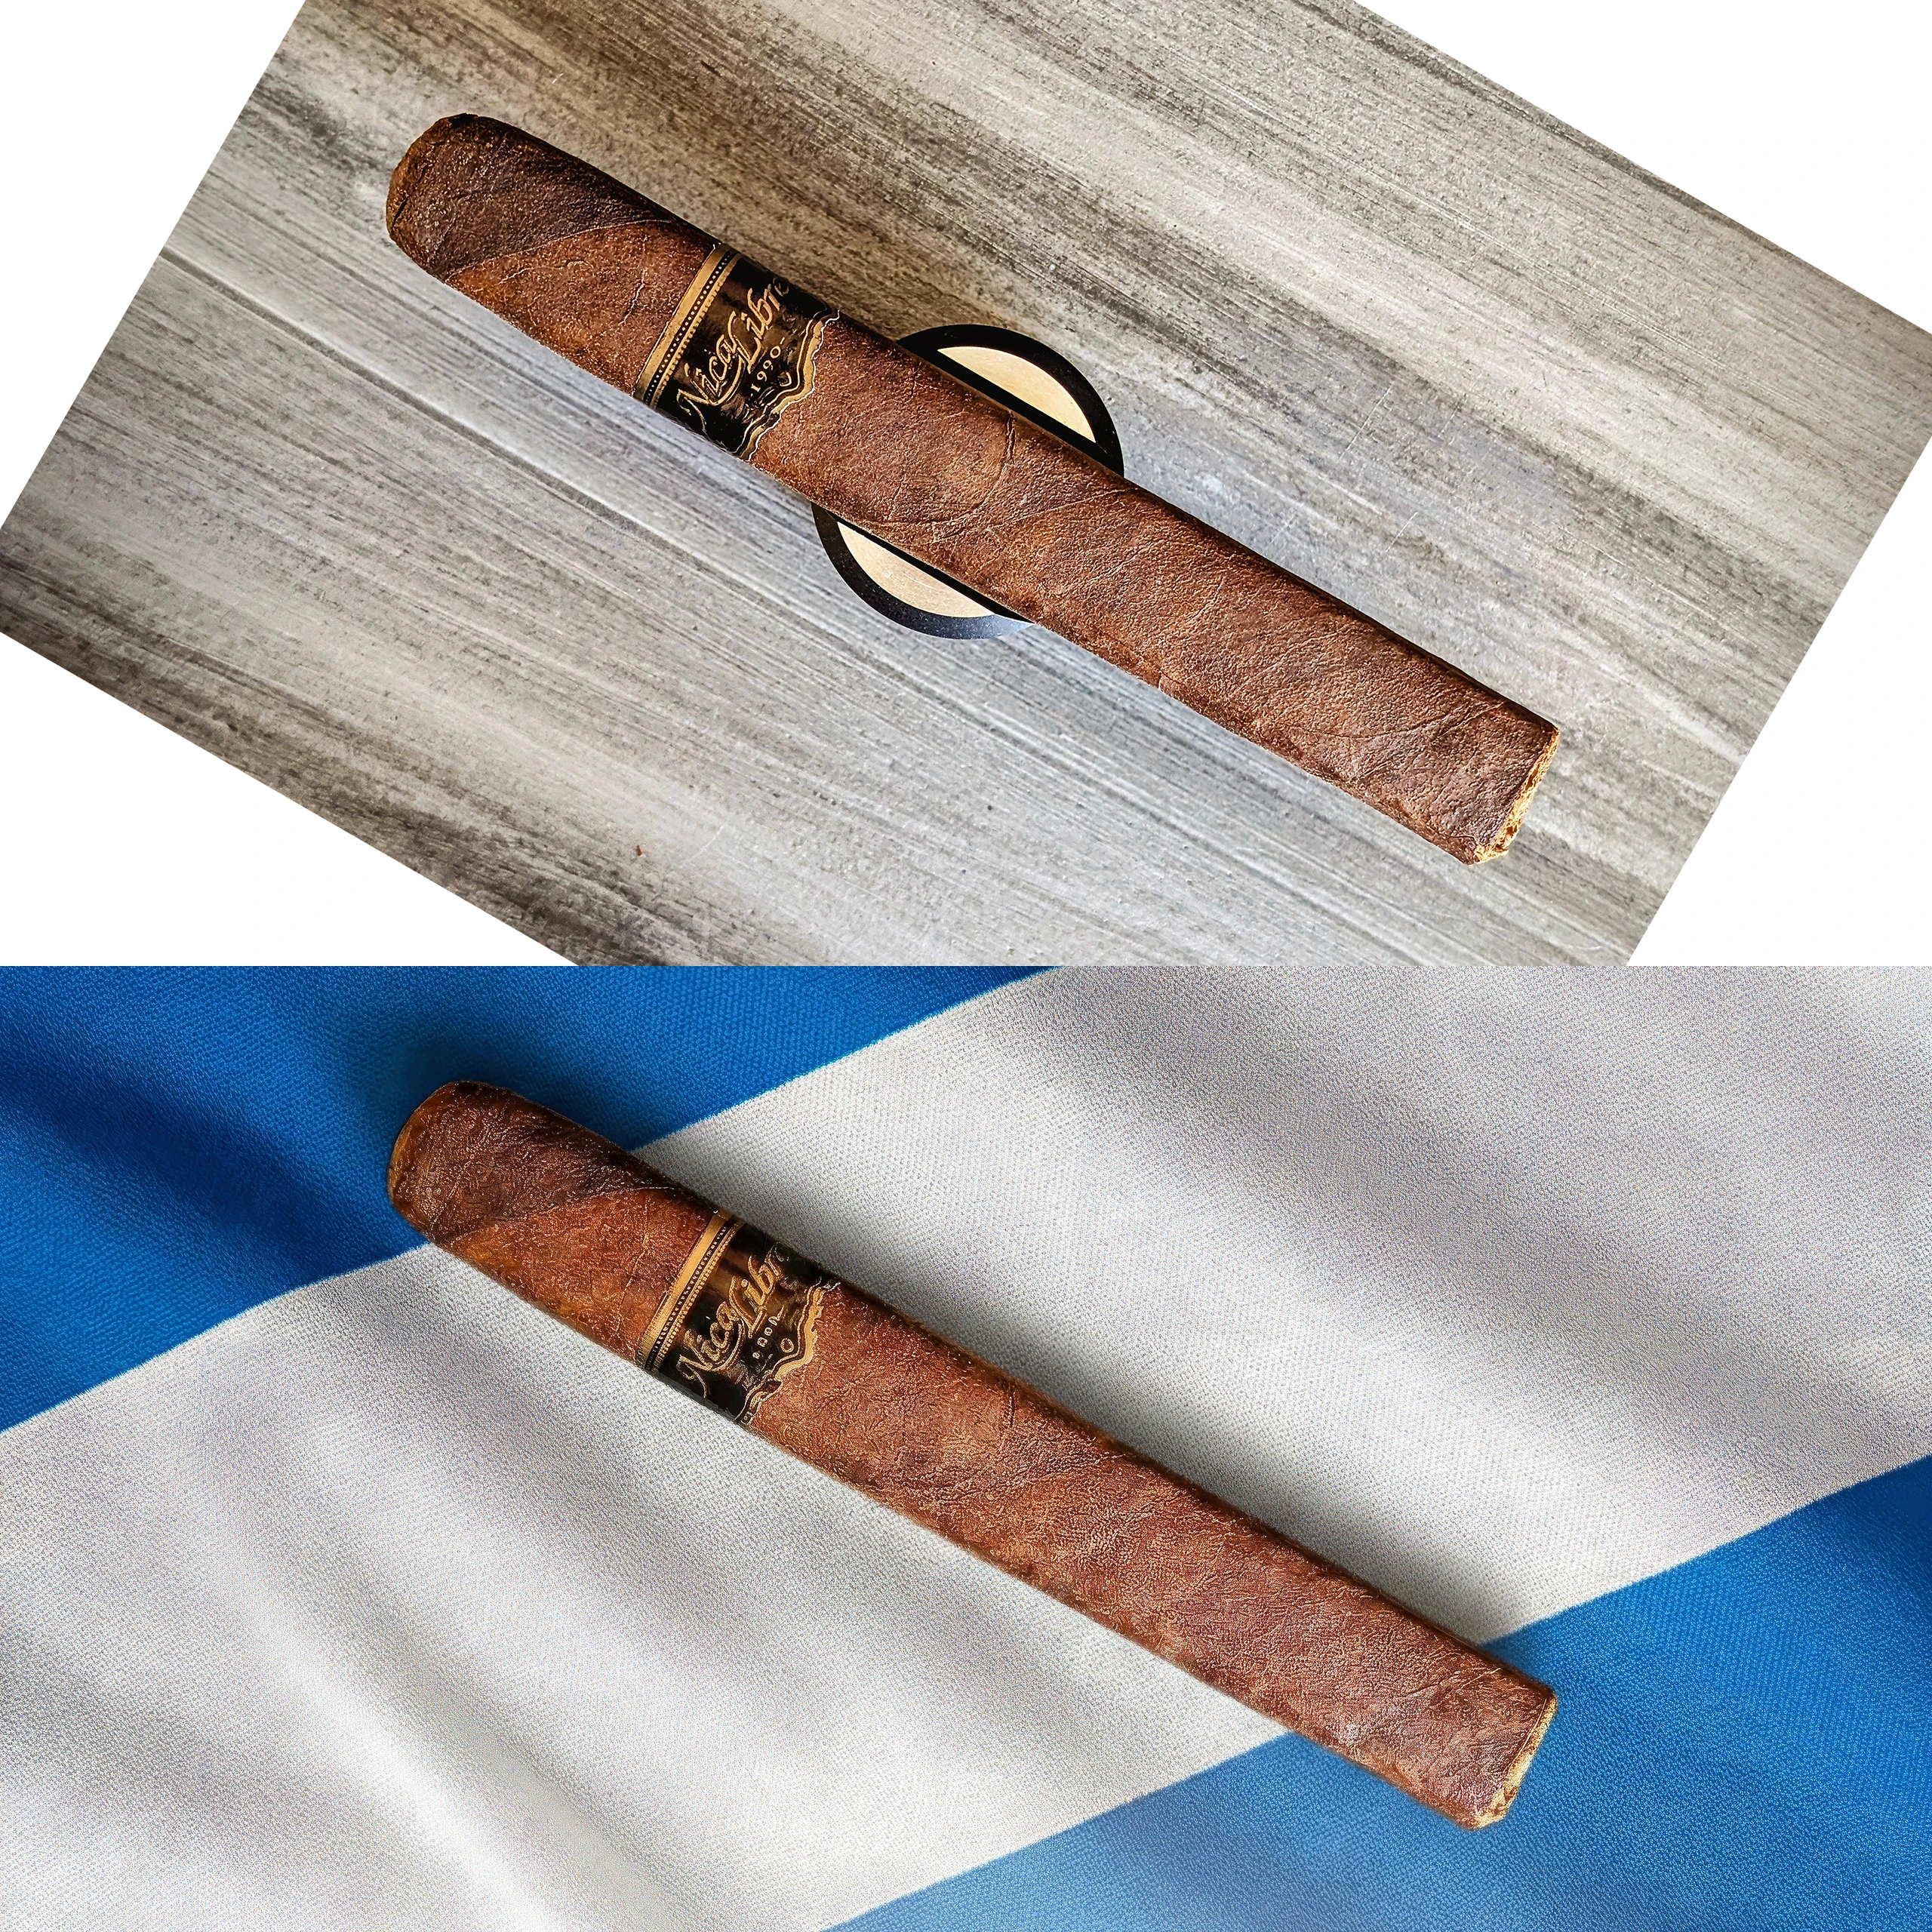
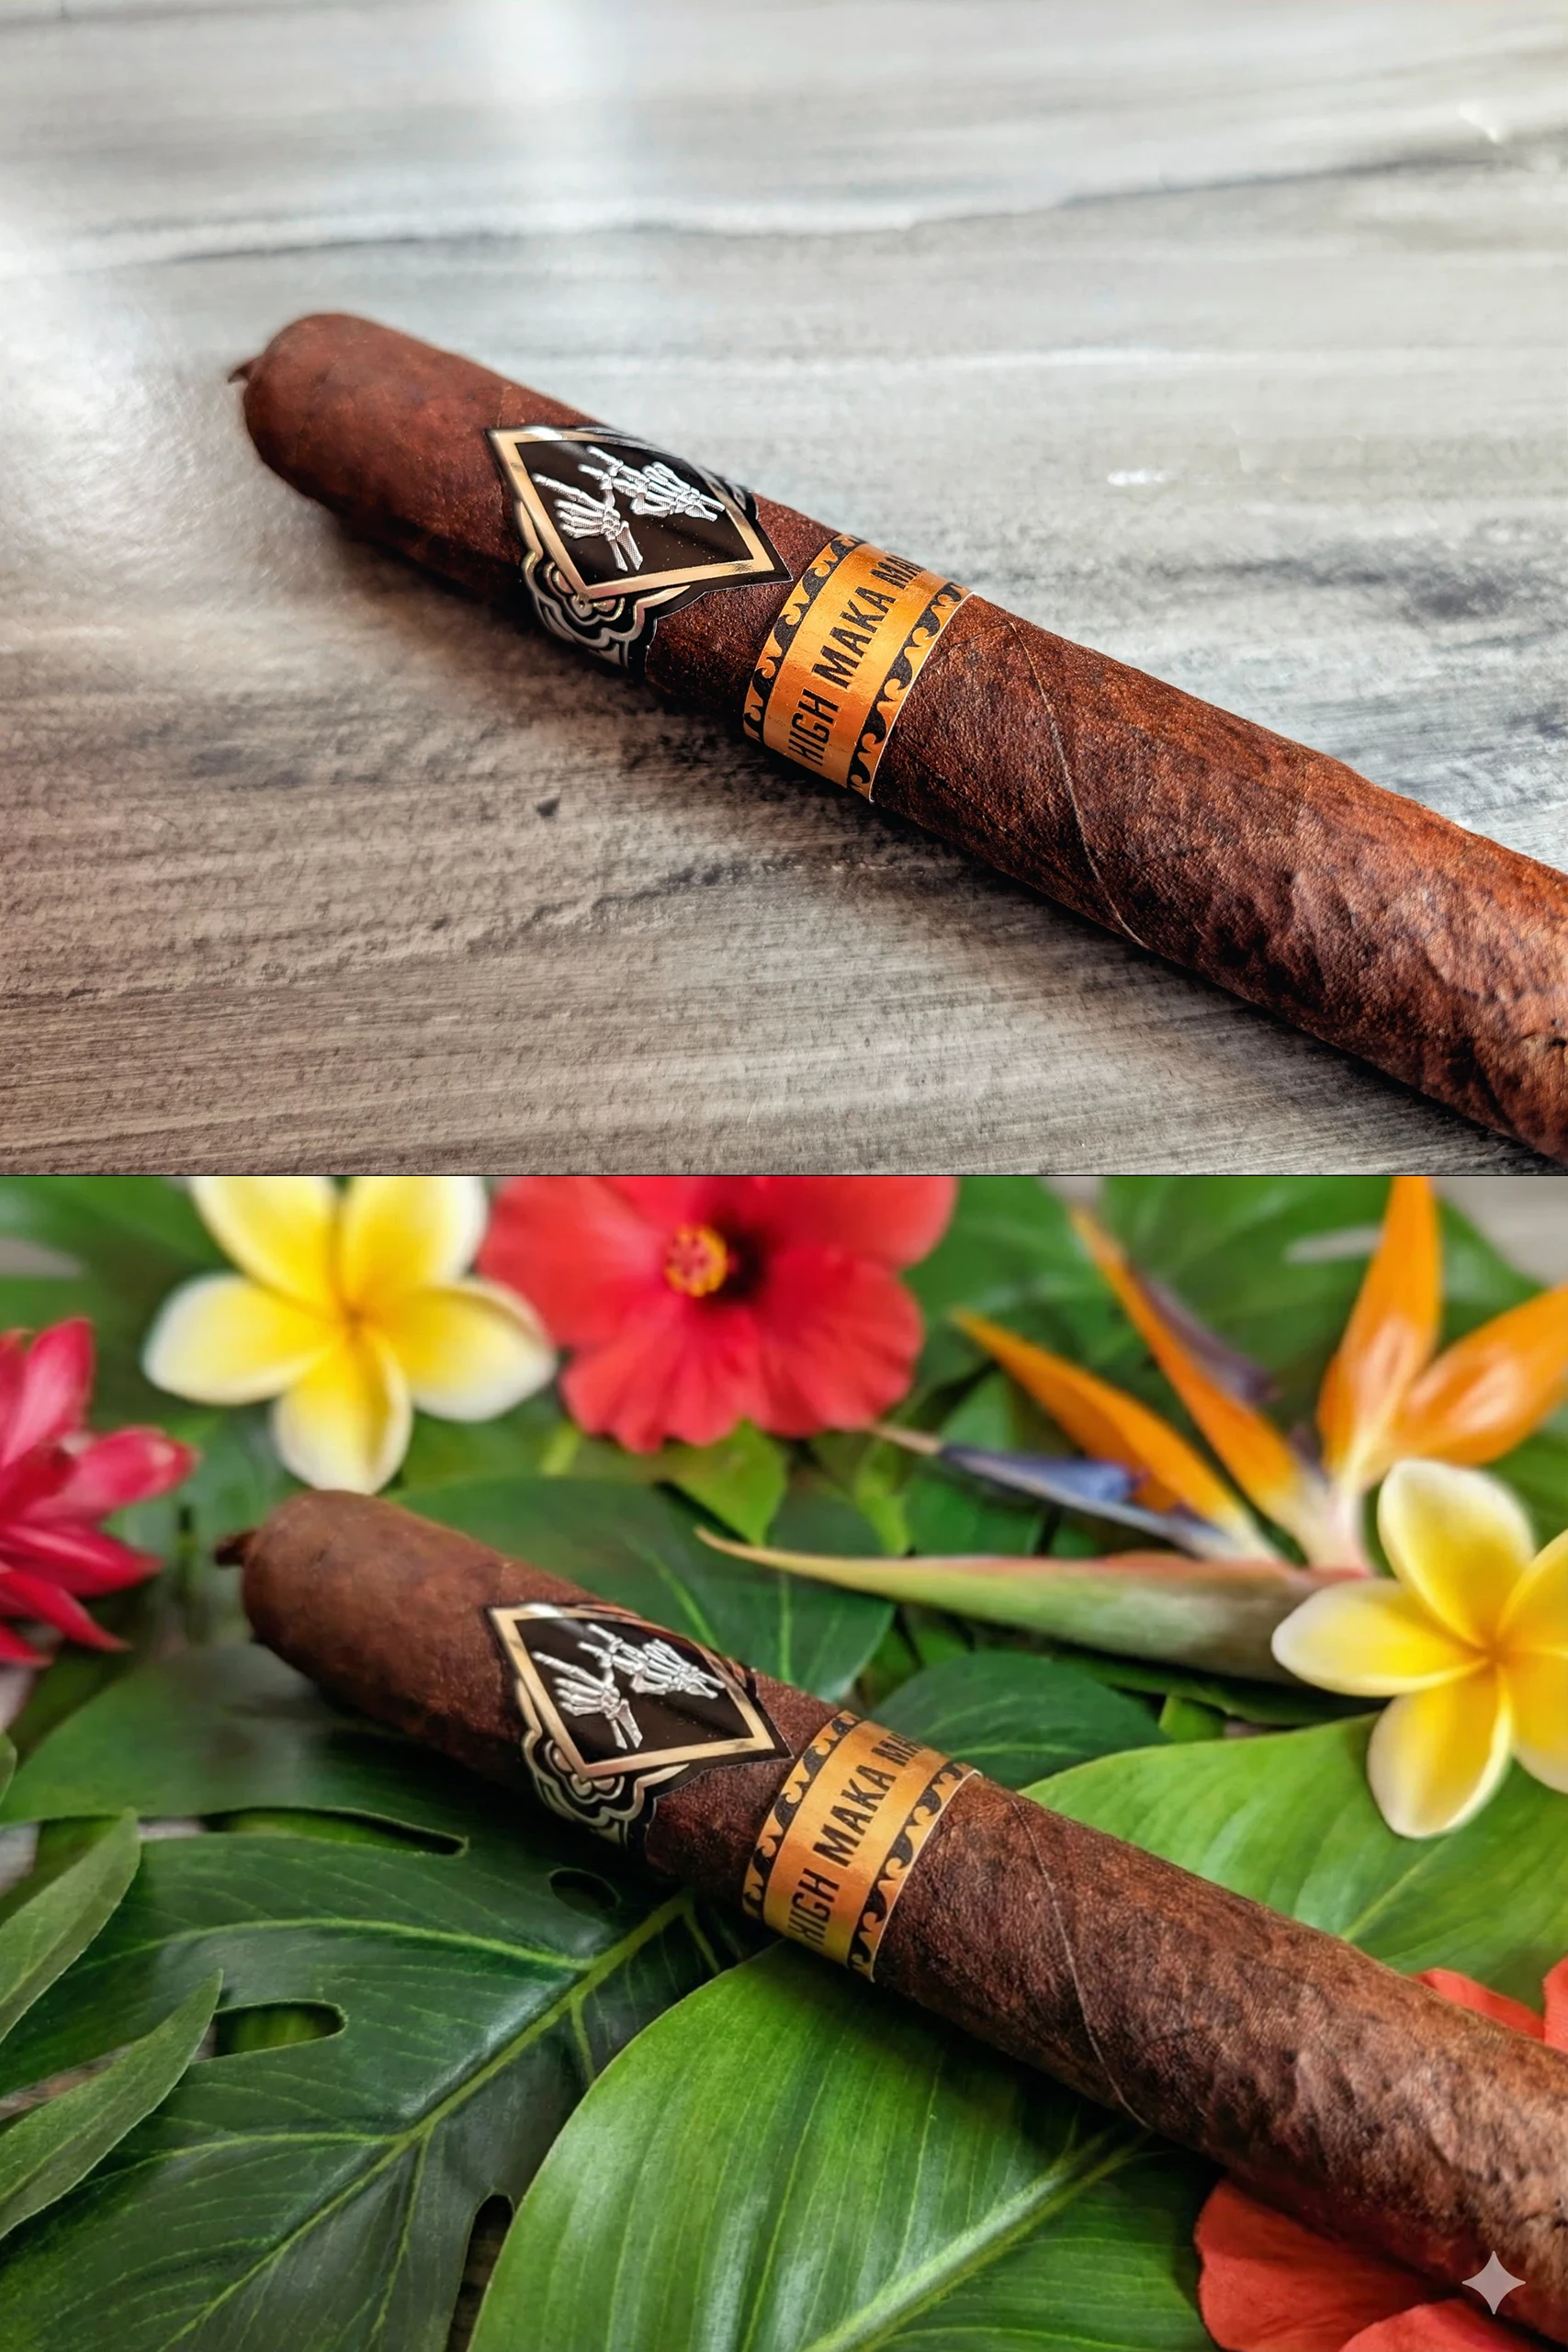
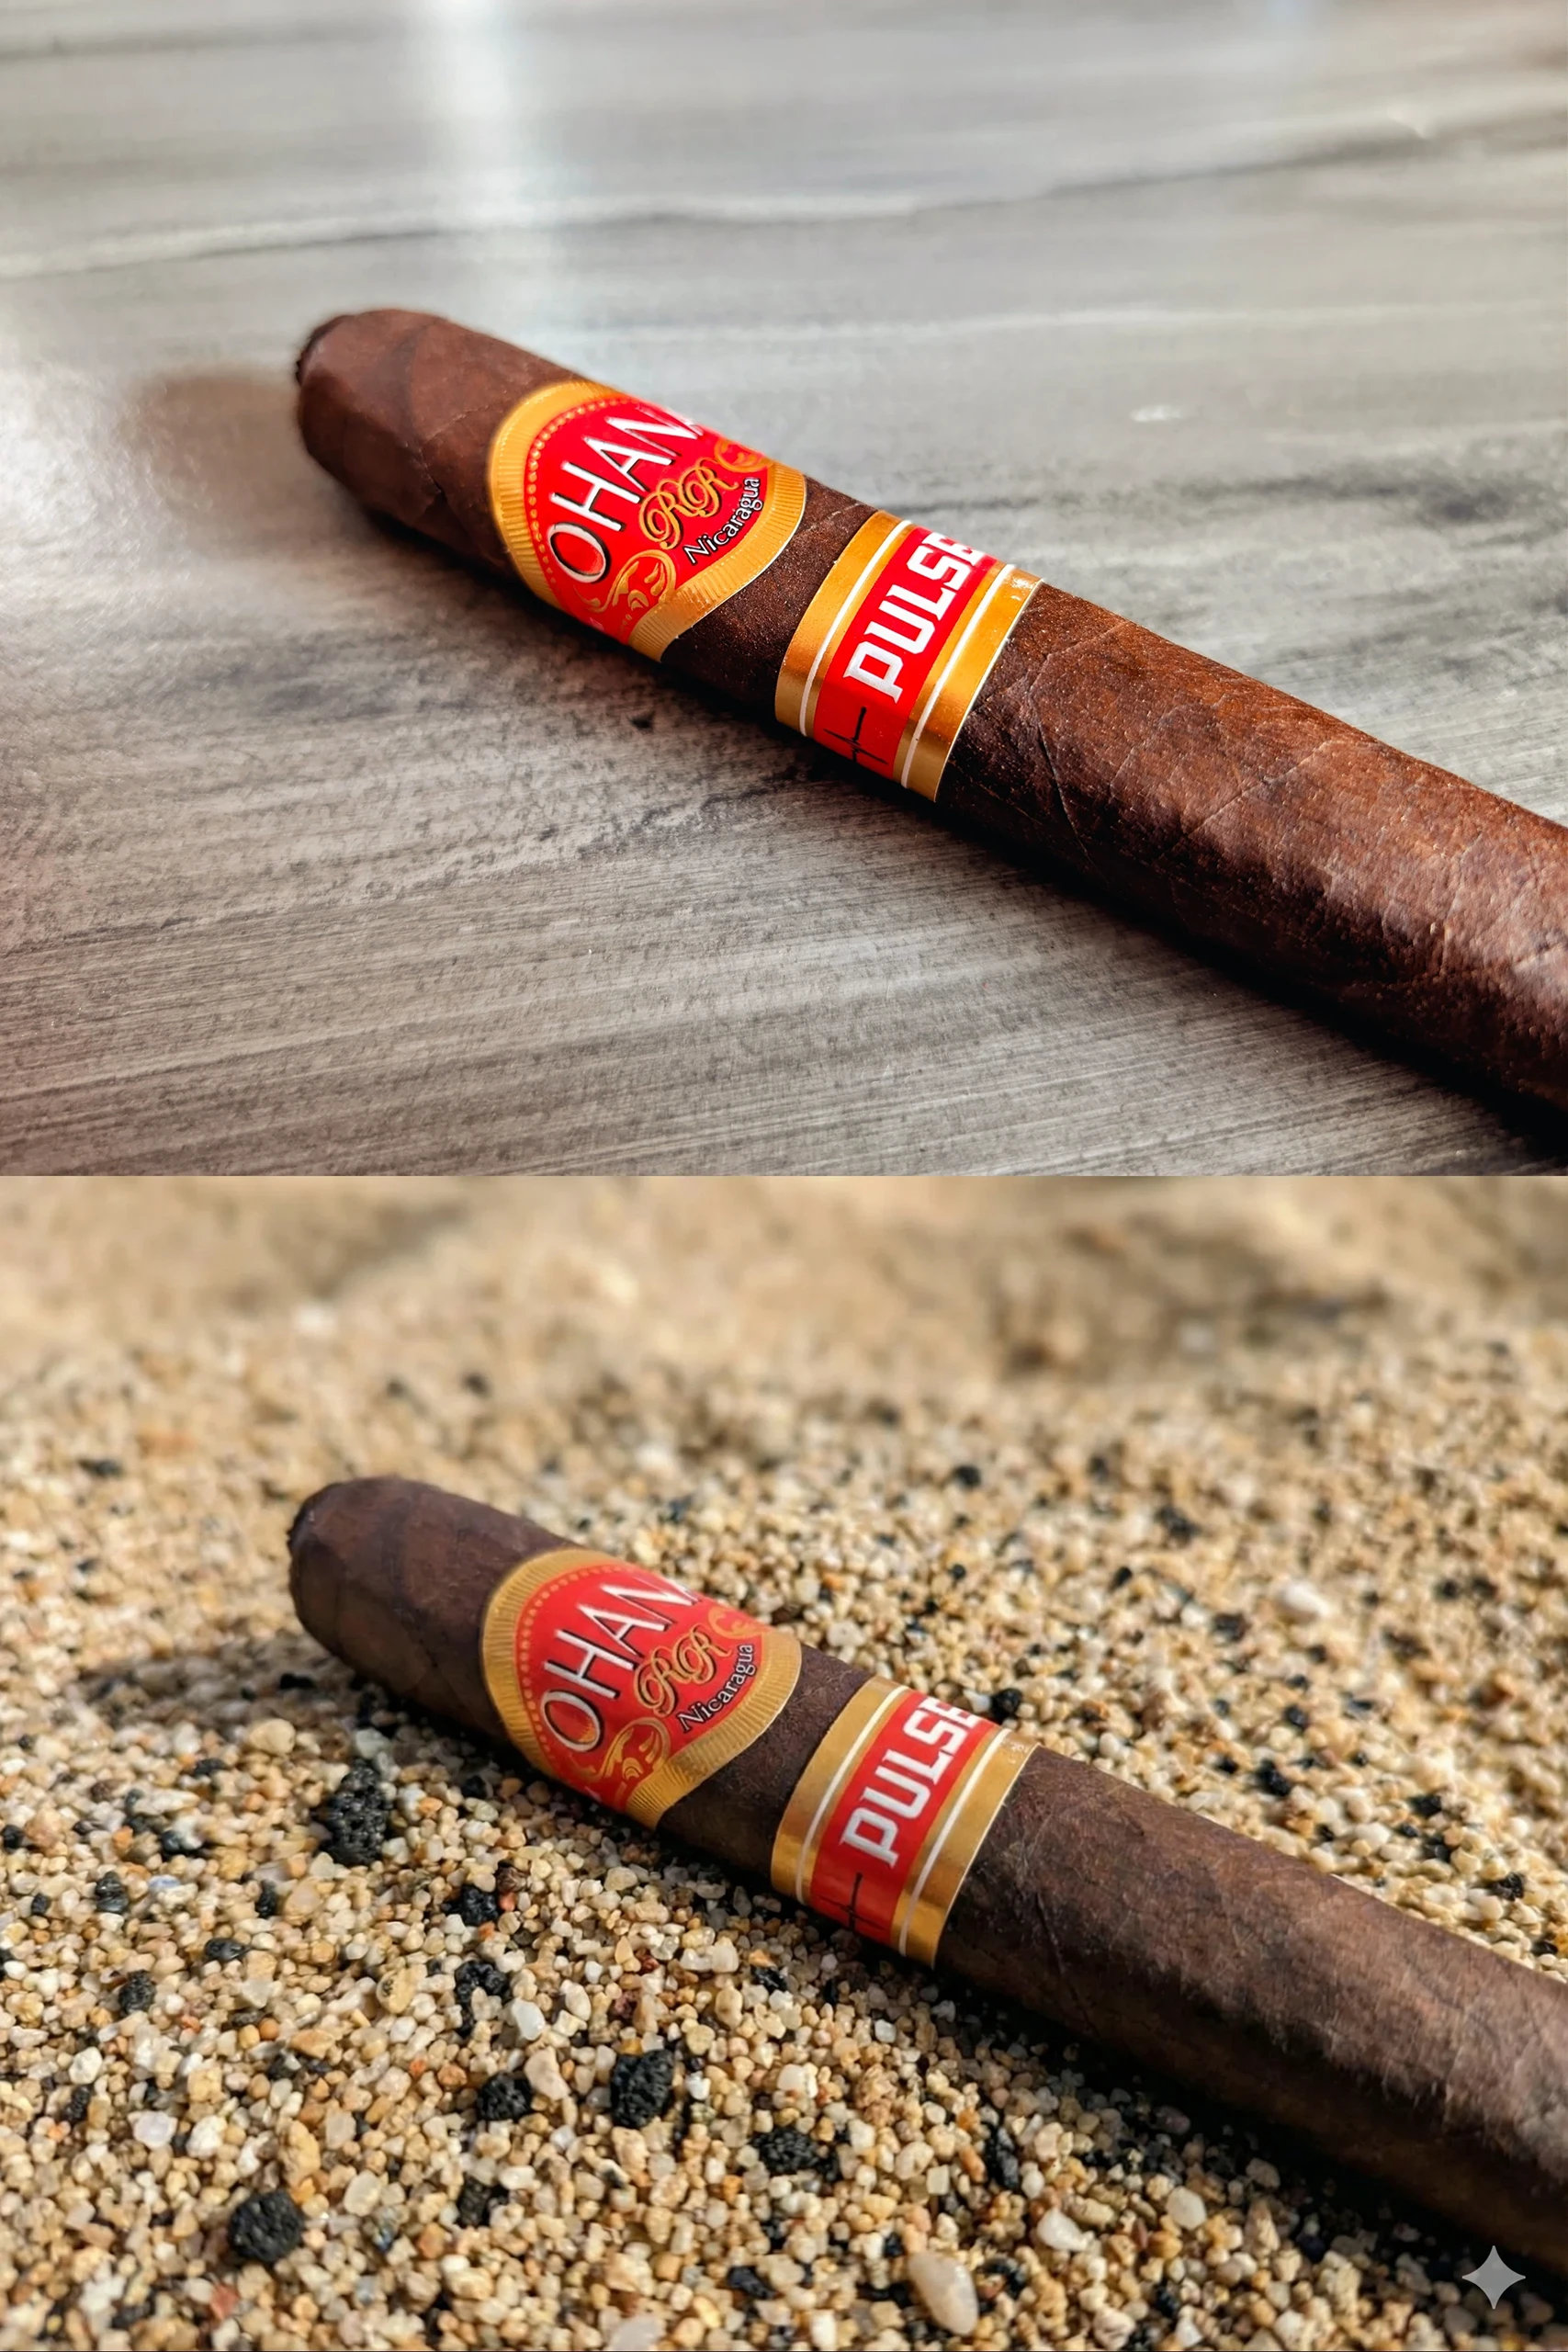
Simple. I don’t want hundreds of the same photo. I essentially have three locations where I take the headline photos for my cigar reviews, and there are only so many ways to photograph a cigar while keeping it interesting. Changing the backdrop, putting the cigar in interesting locations, or extending a cigar’s theme—this is where AI comes in handy. In each of the photos below, you’ll see the original photo and the raw image AI generated.
For example, in each photo I was able to replace the background with:
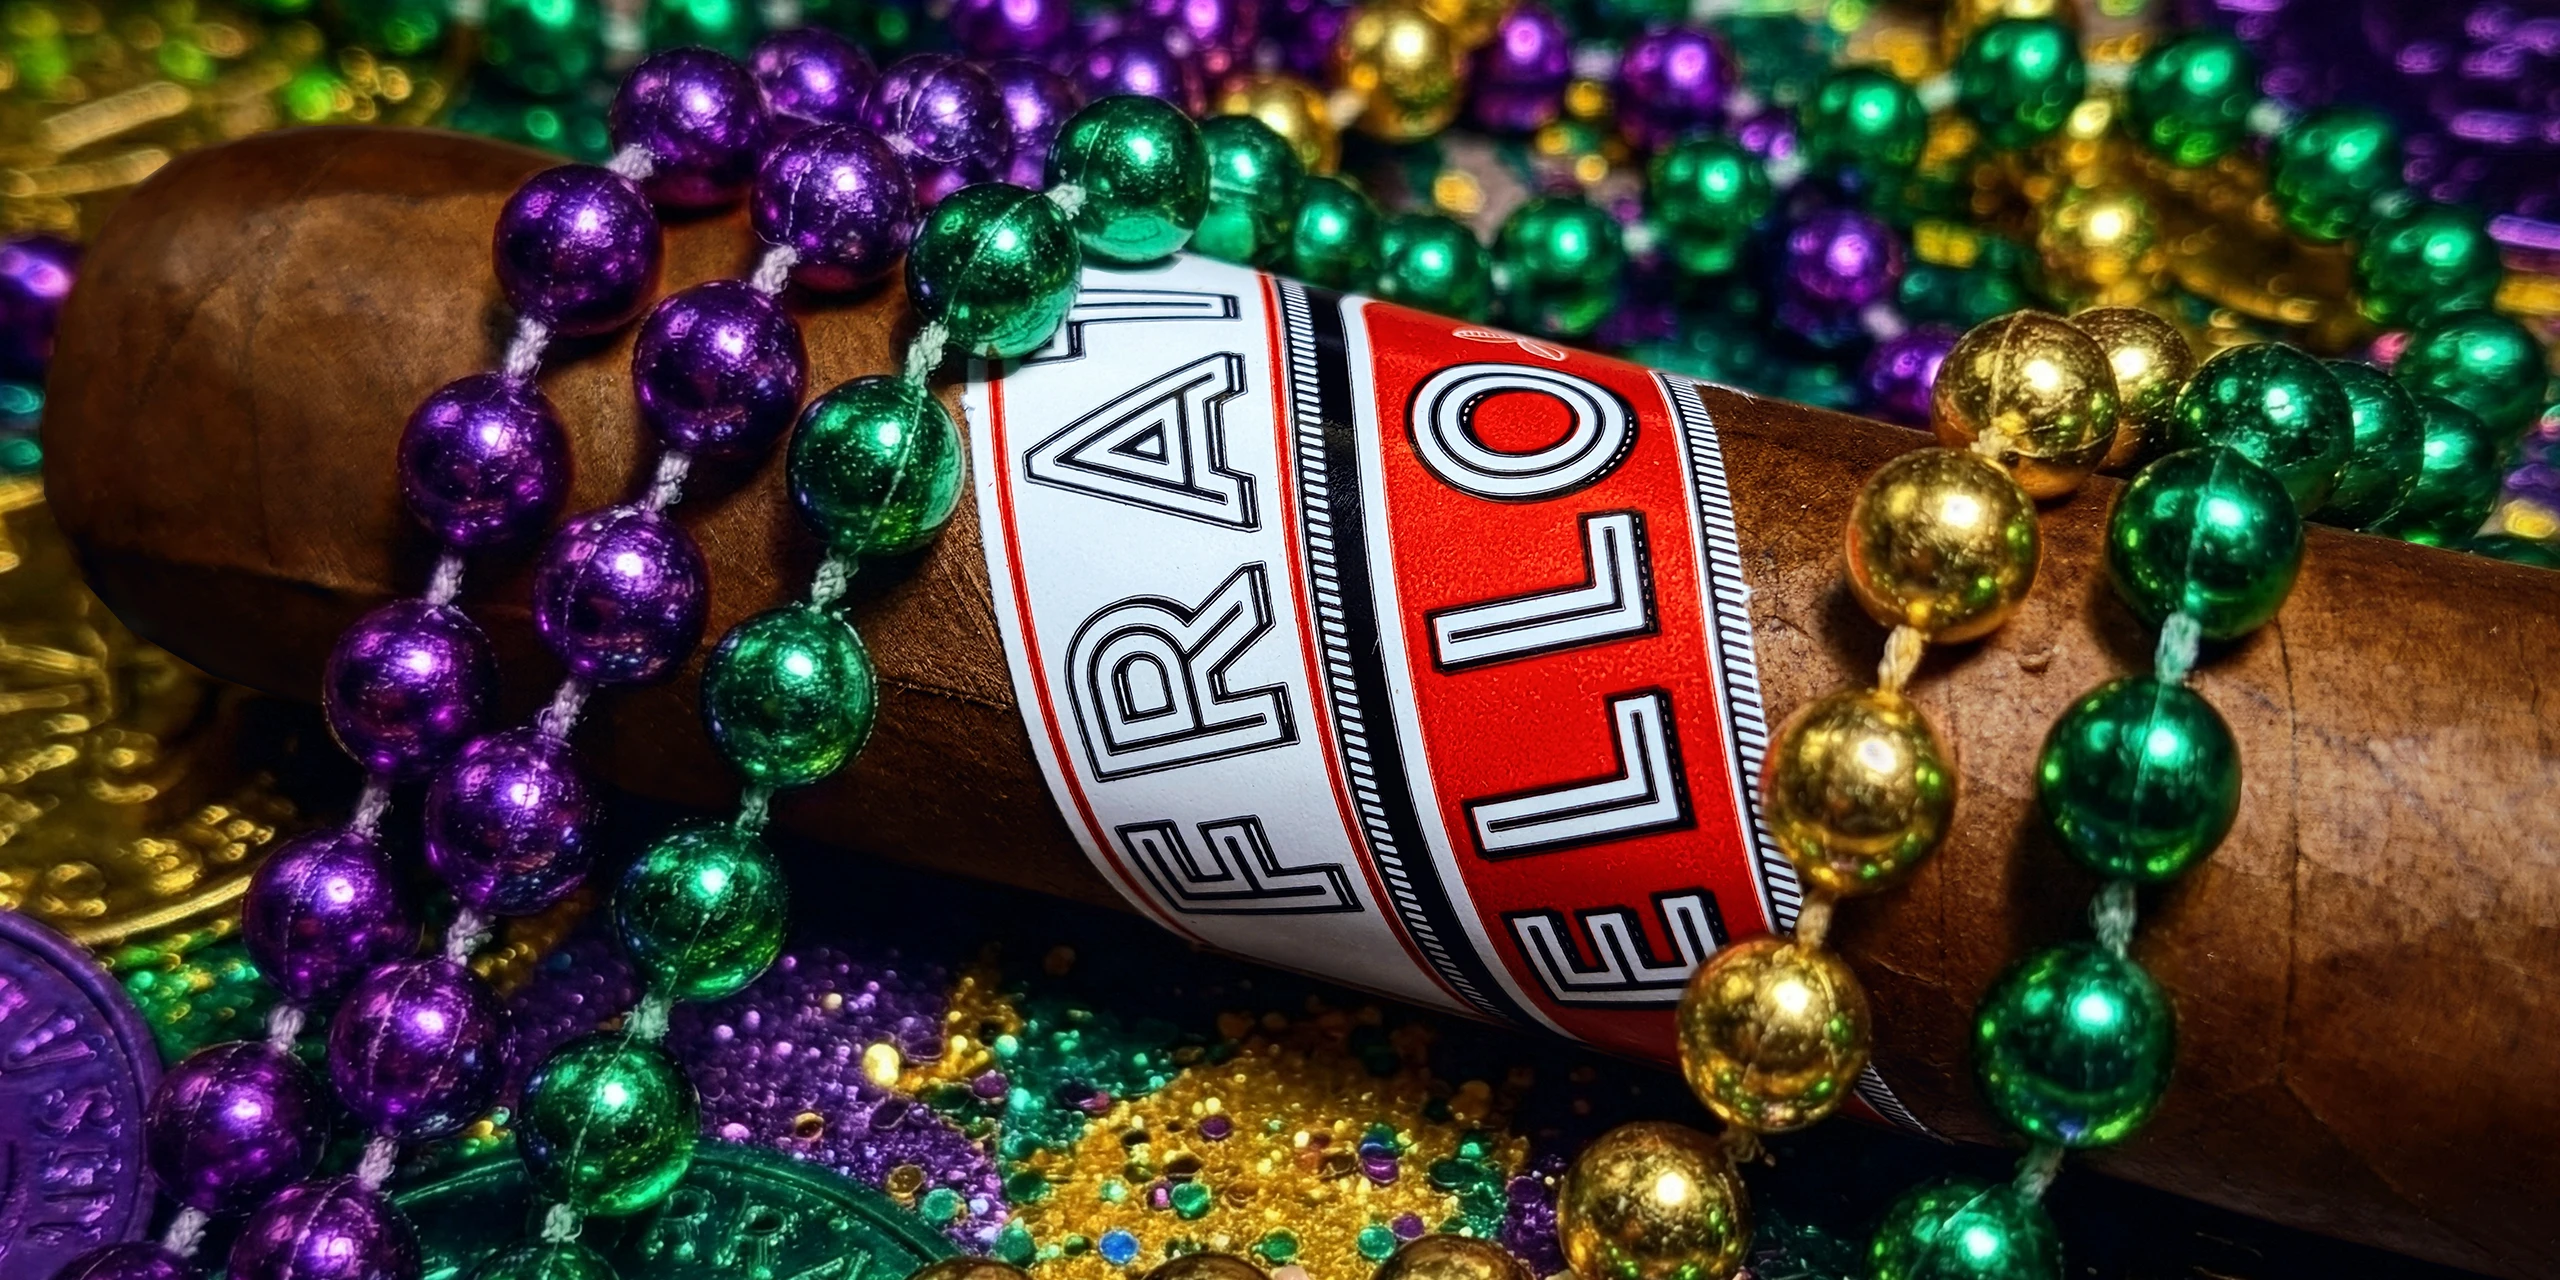
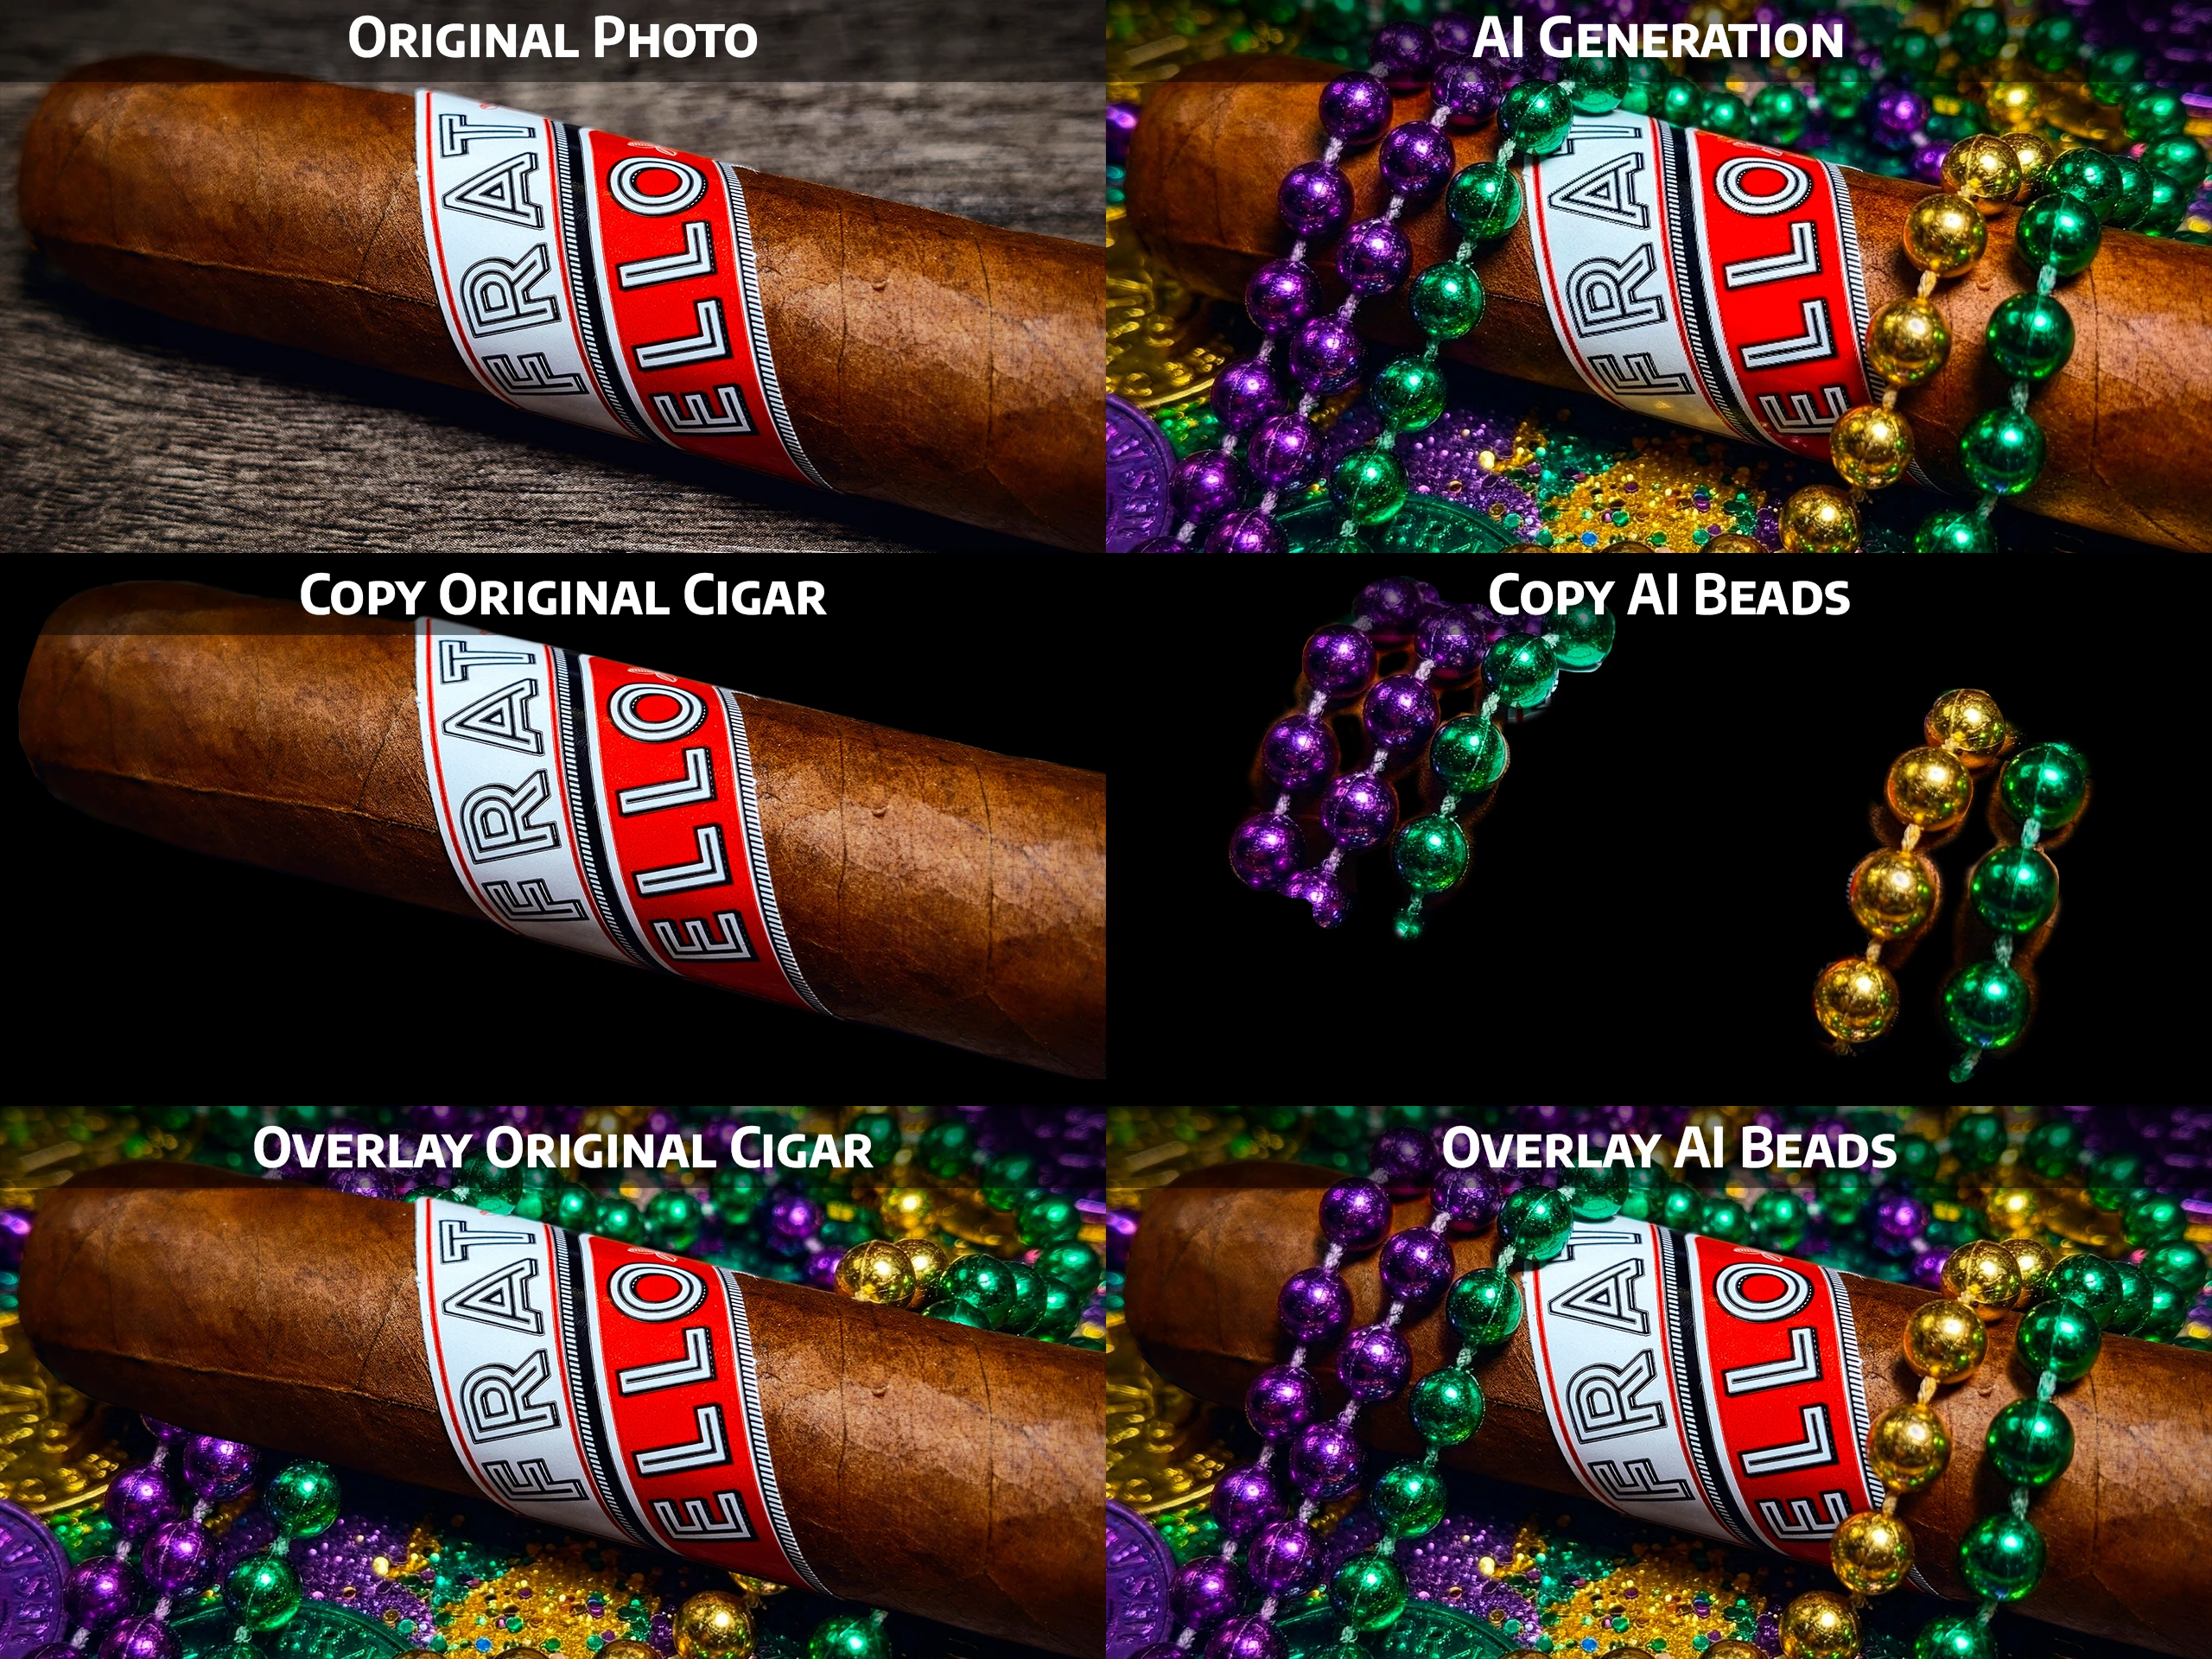
- The Fratello Pelican: Mardi Gras themed glitter, coins, and beads as it’s a Louisiana exclusive release.
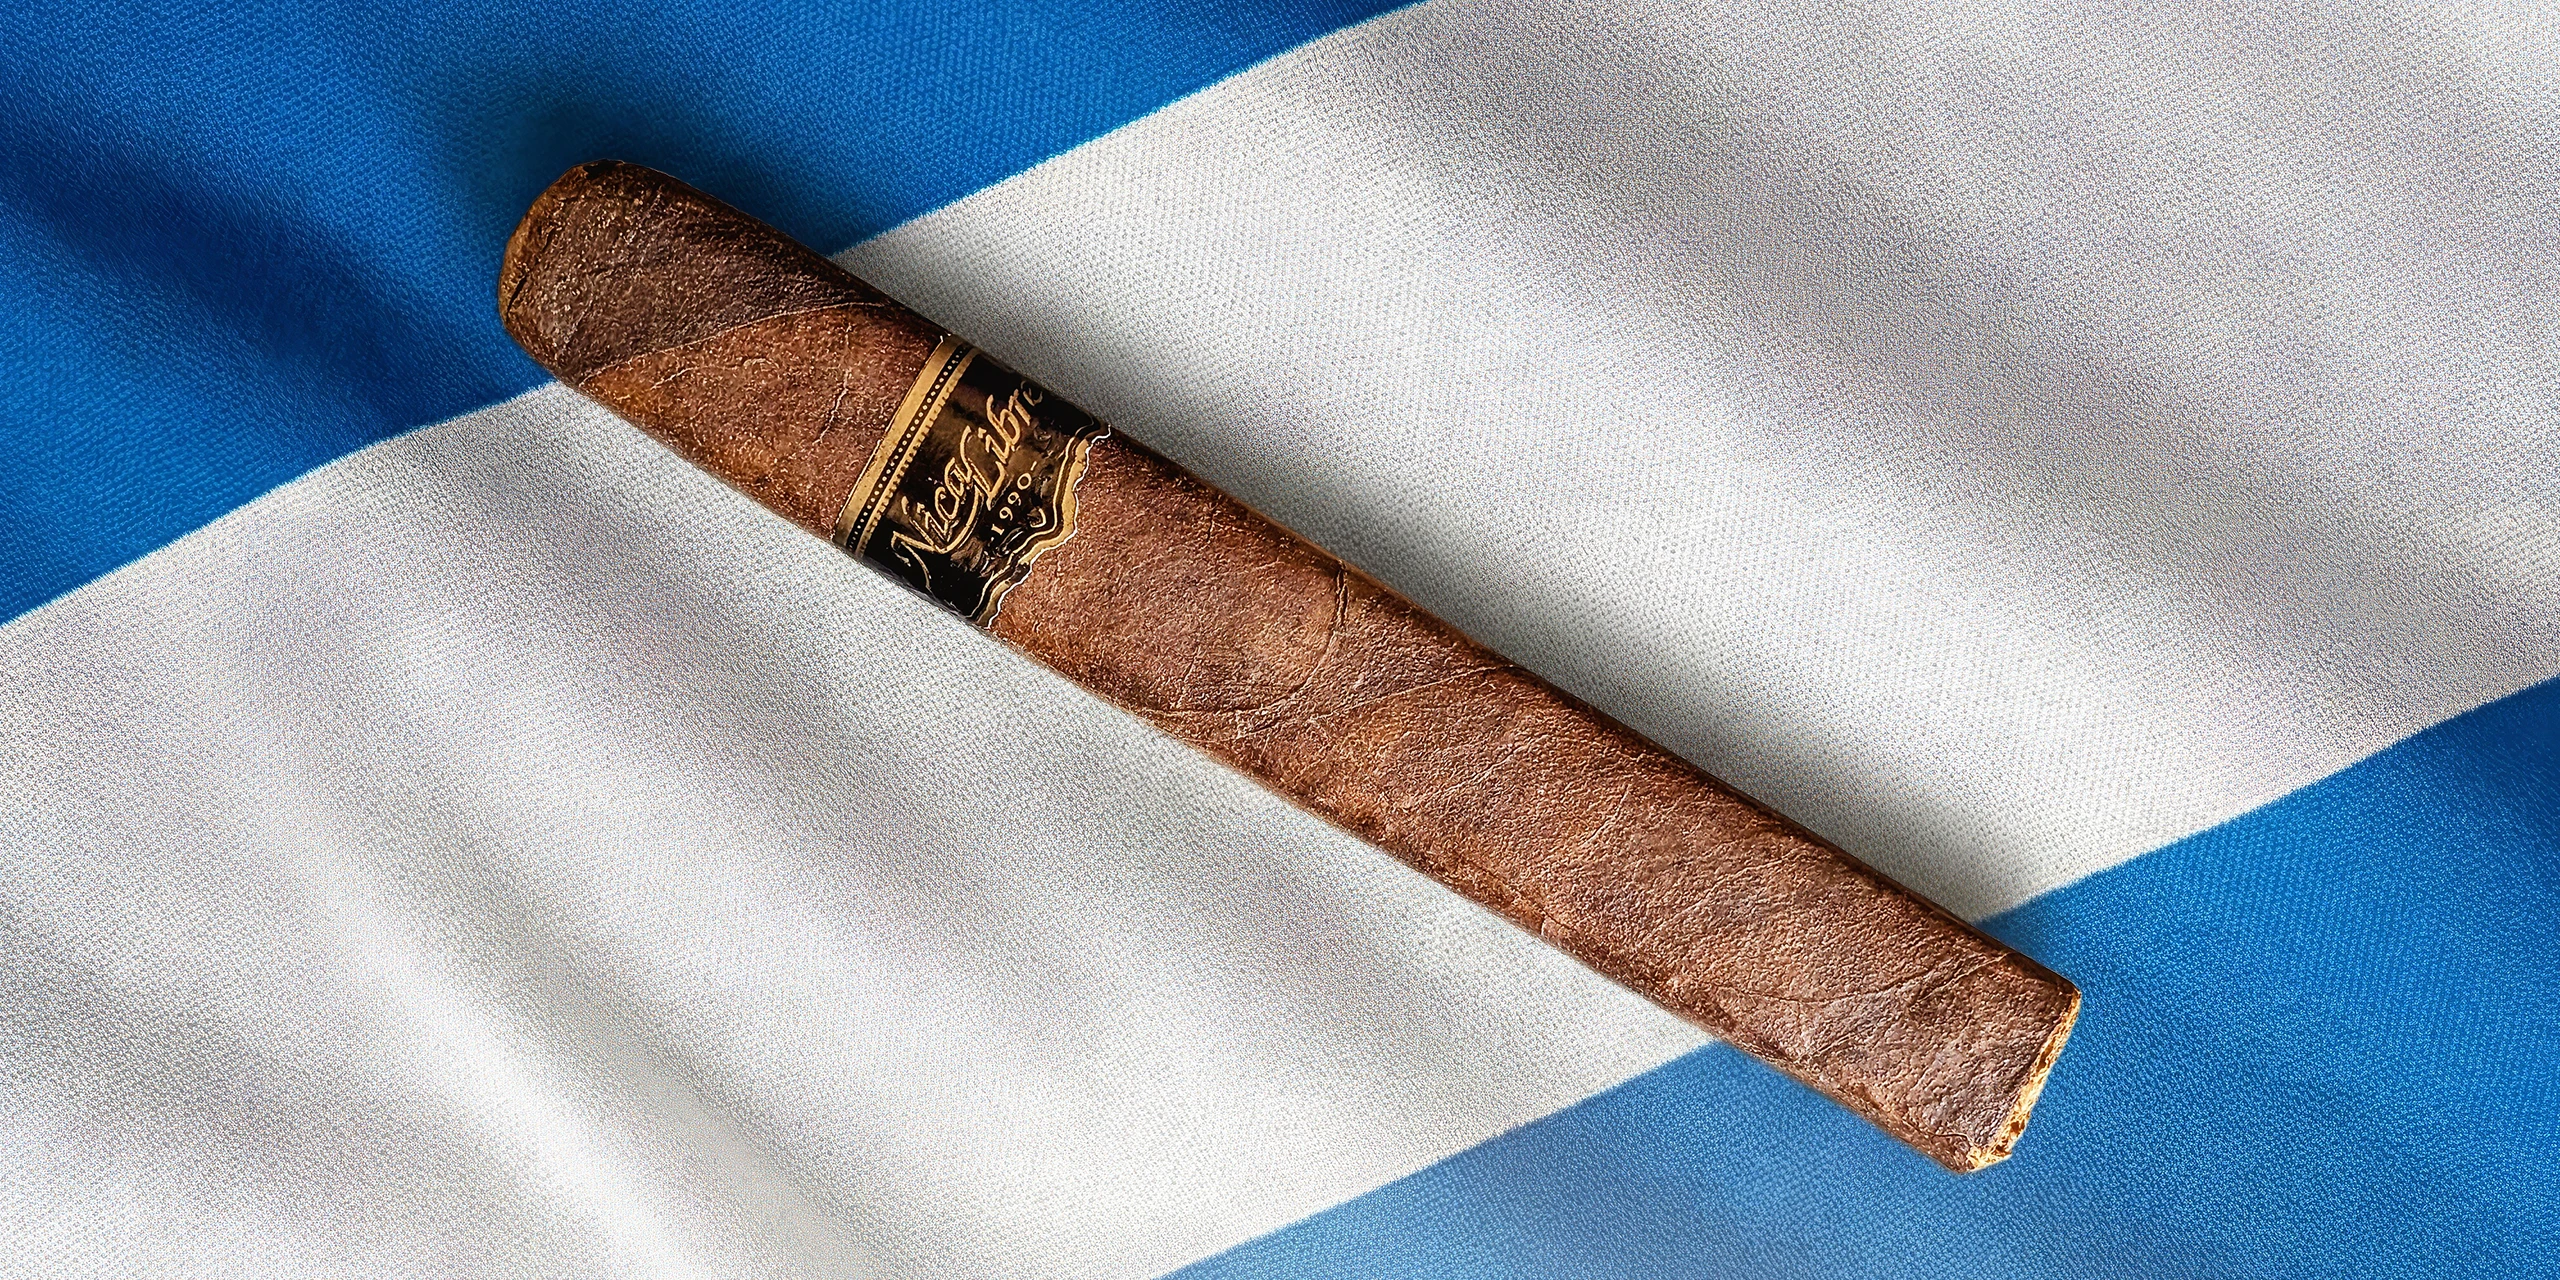
- Nica Libre: fabric featuring the colors and design of the Nicaraguan flag.
- Ohana Left Hand High Maka Maka: Hawaiian flowers.
- Ohana Pulse Maduro 10: Hawaiian volcanic sand.
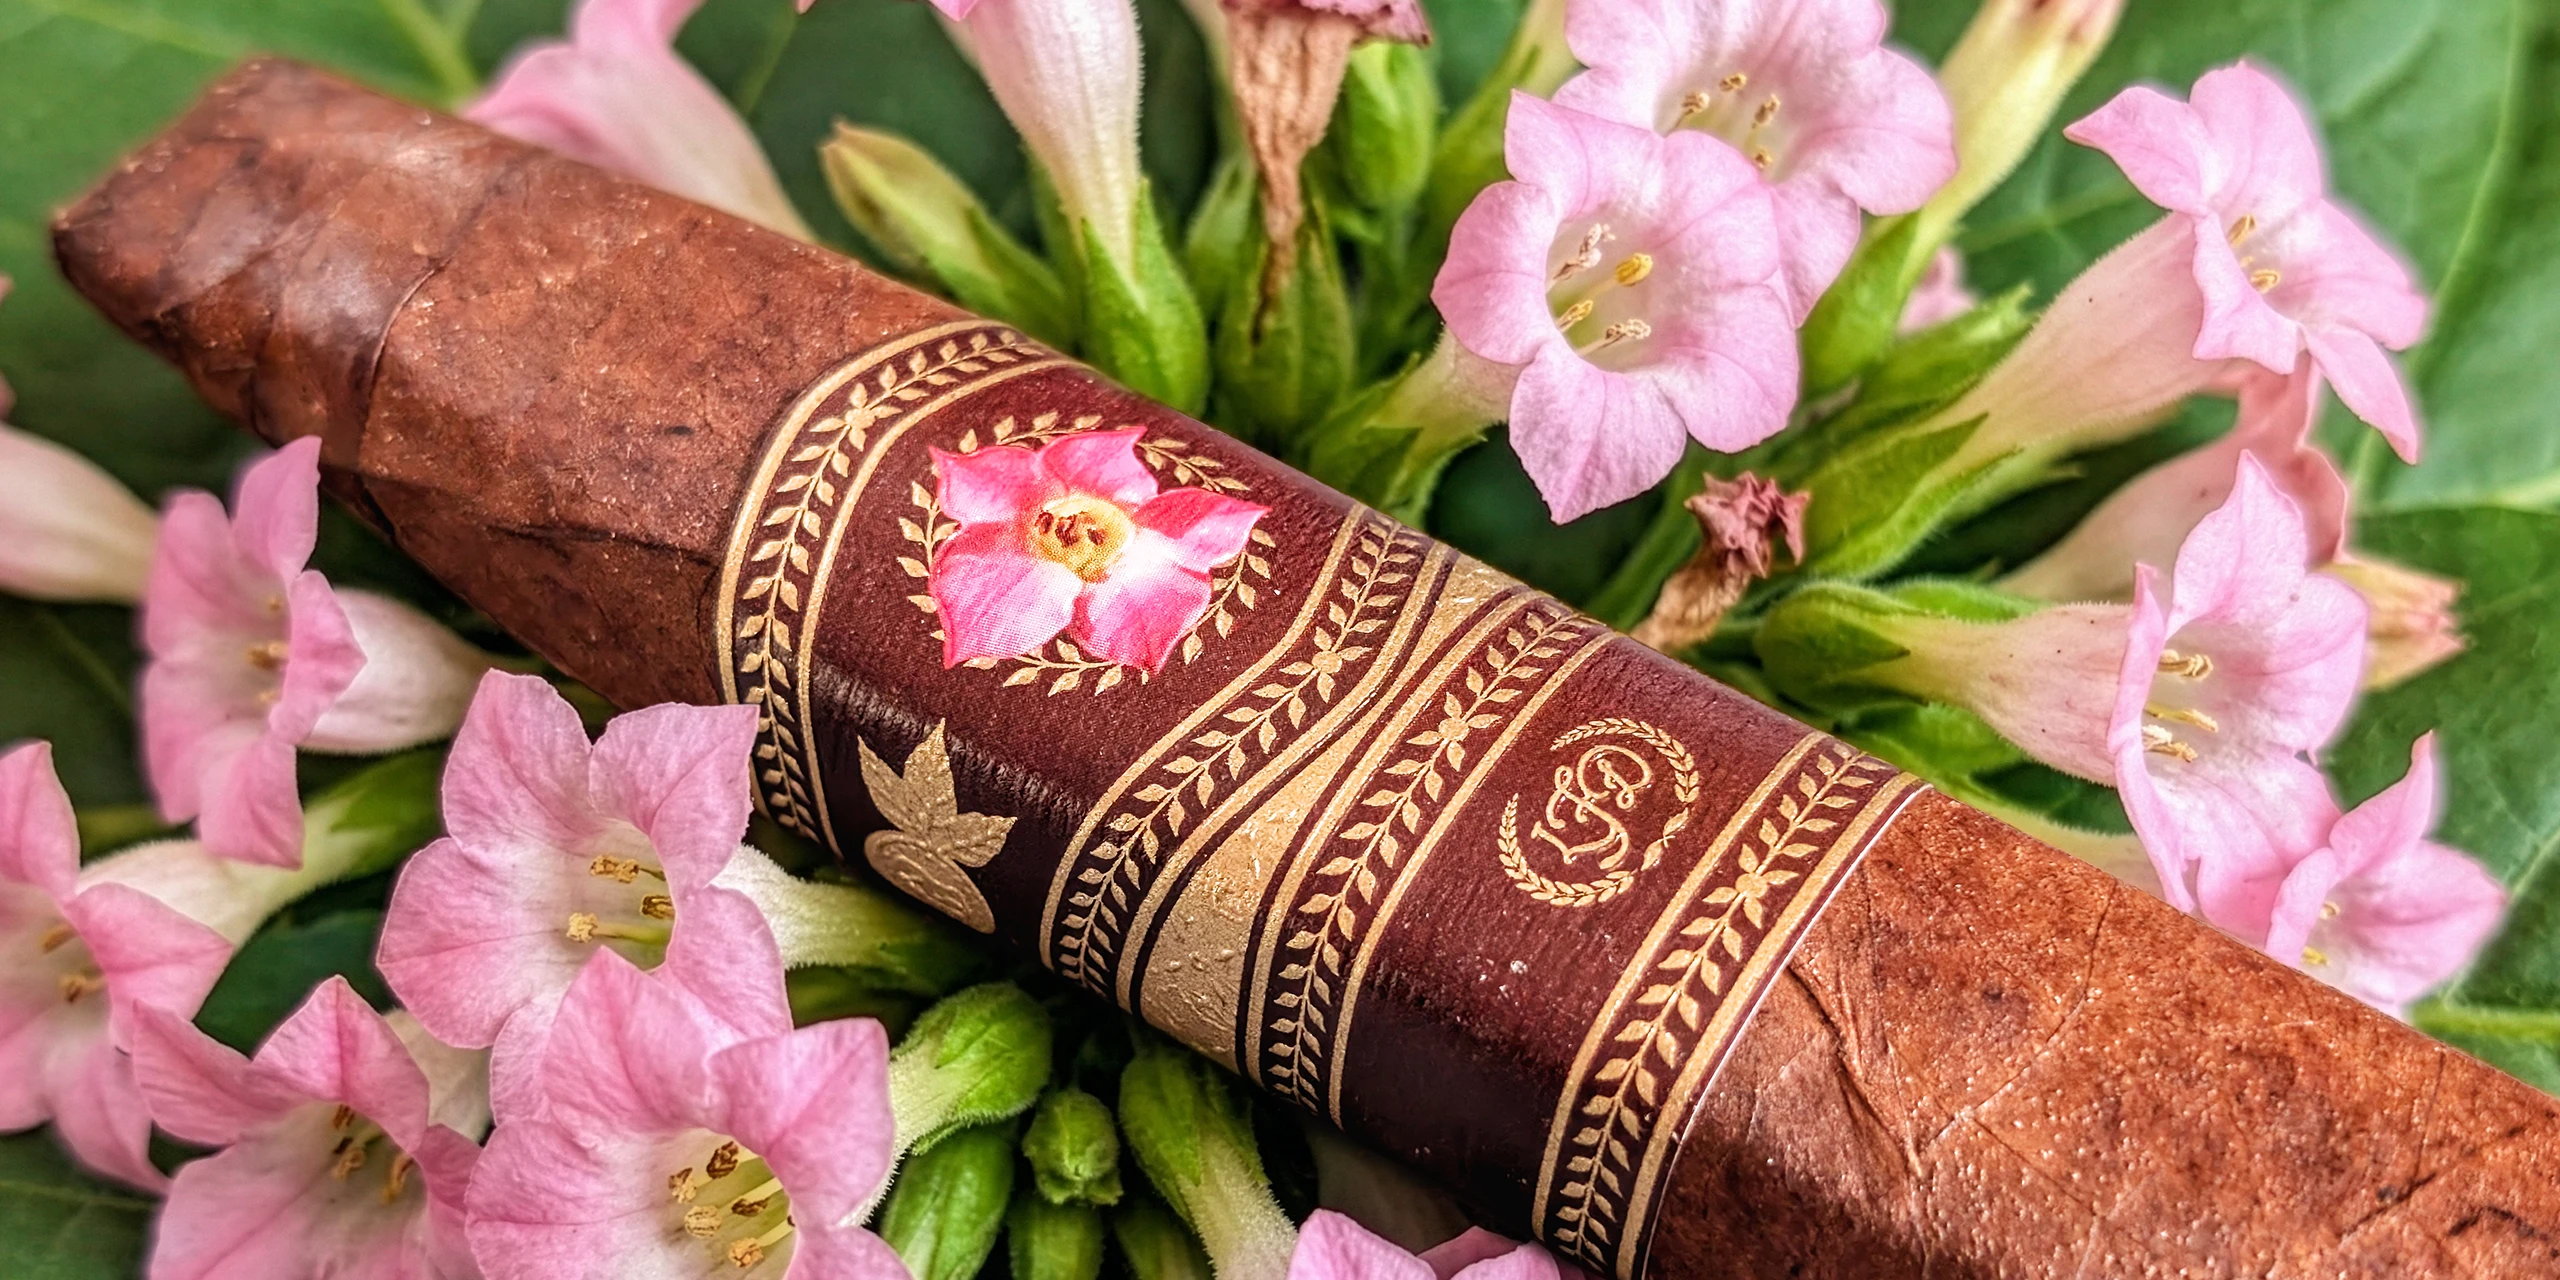
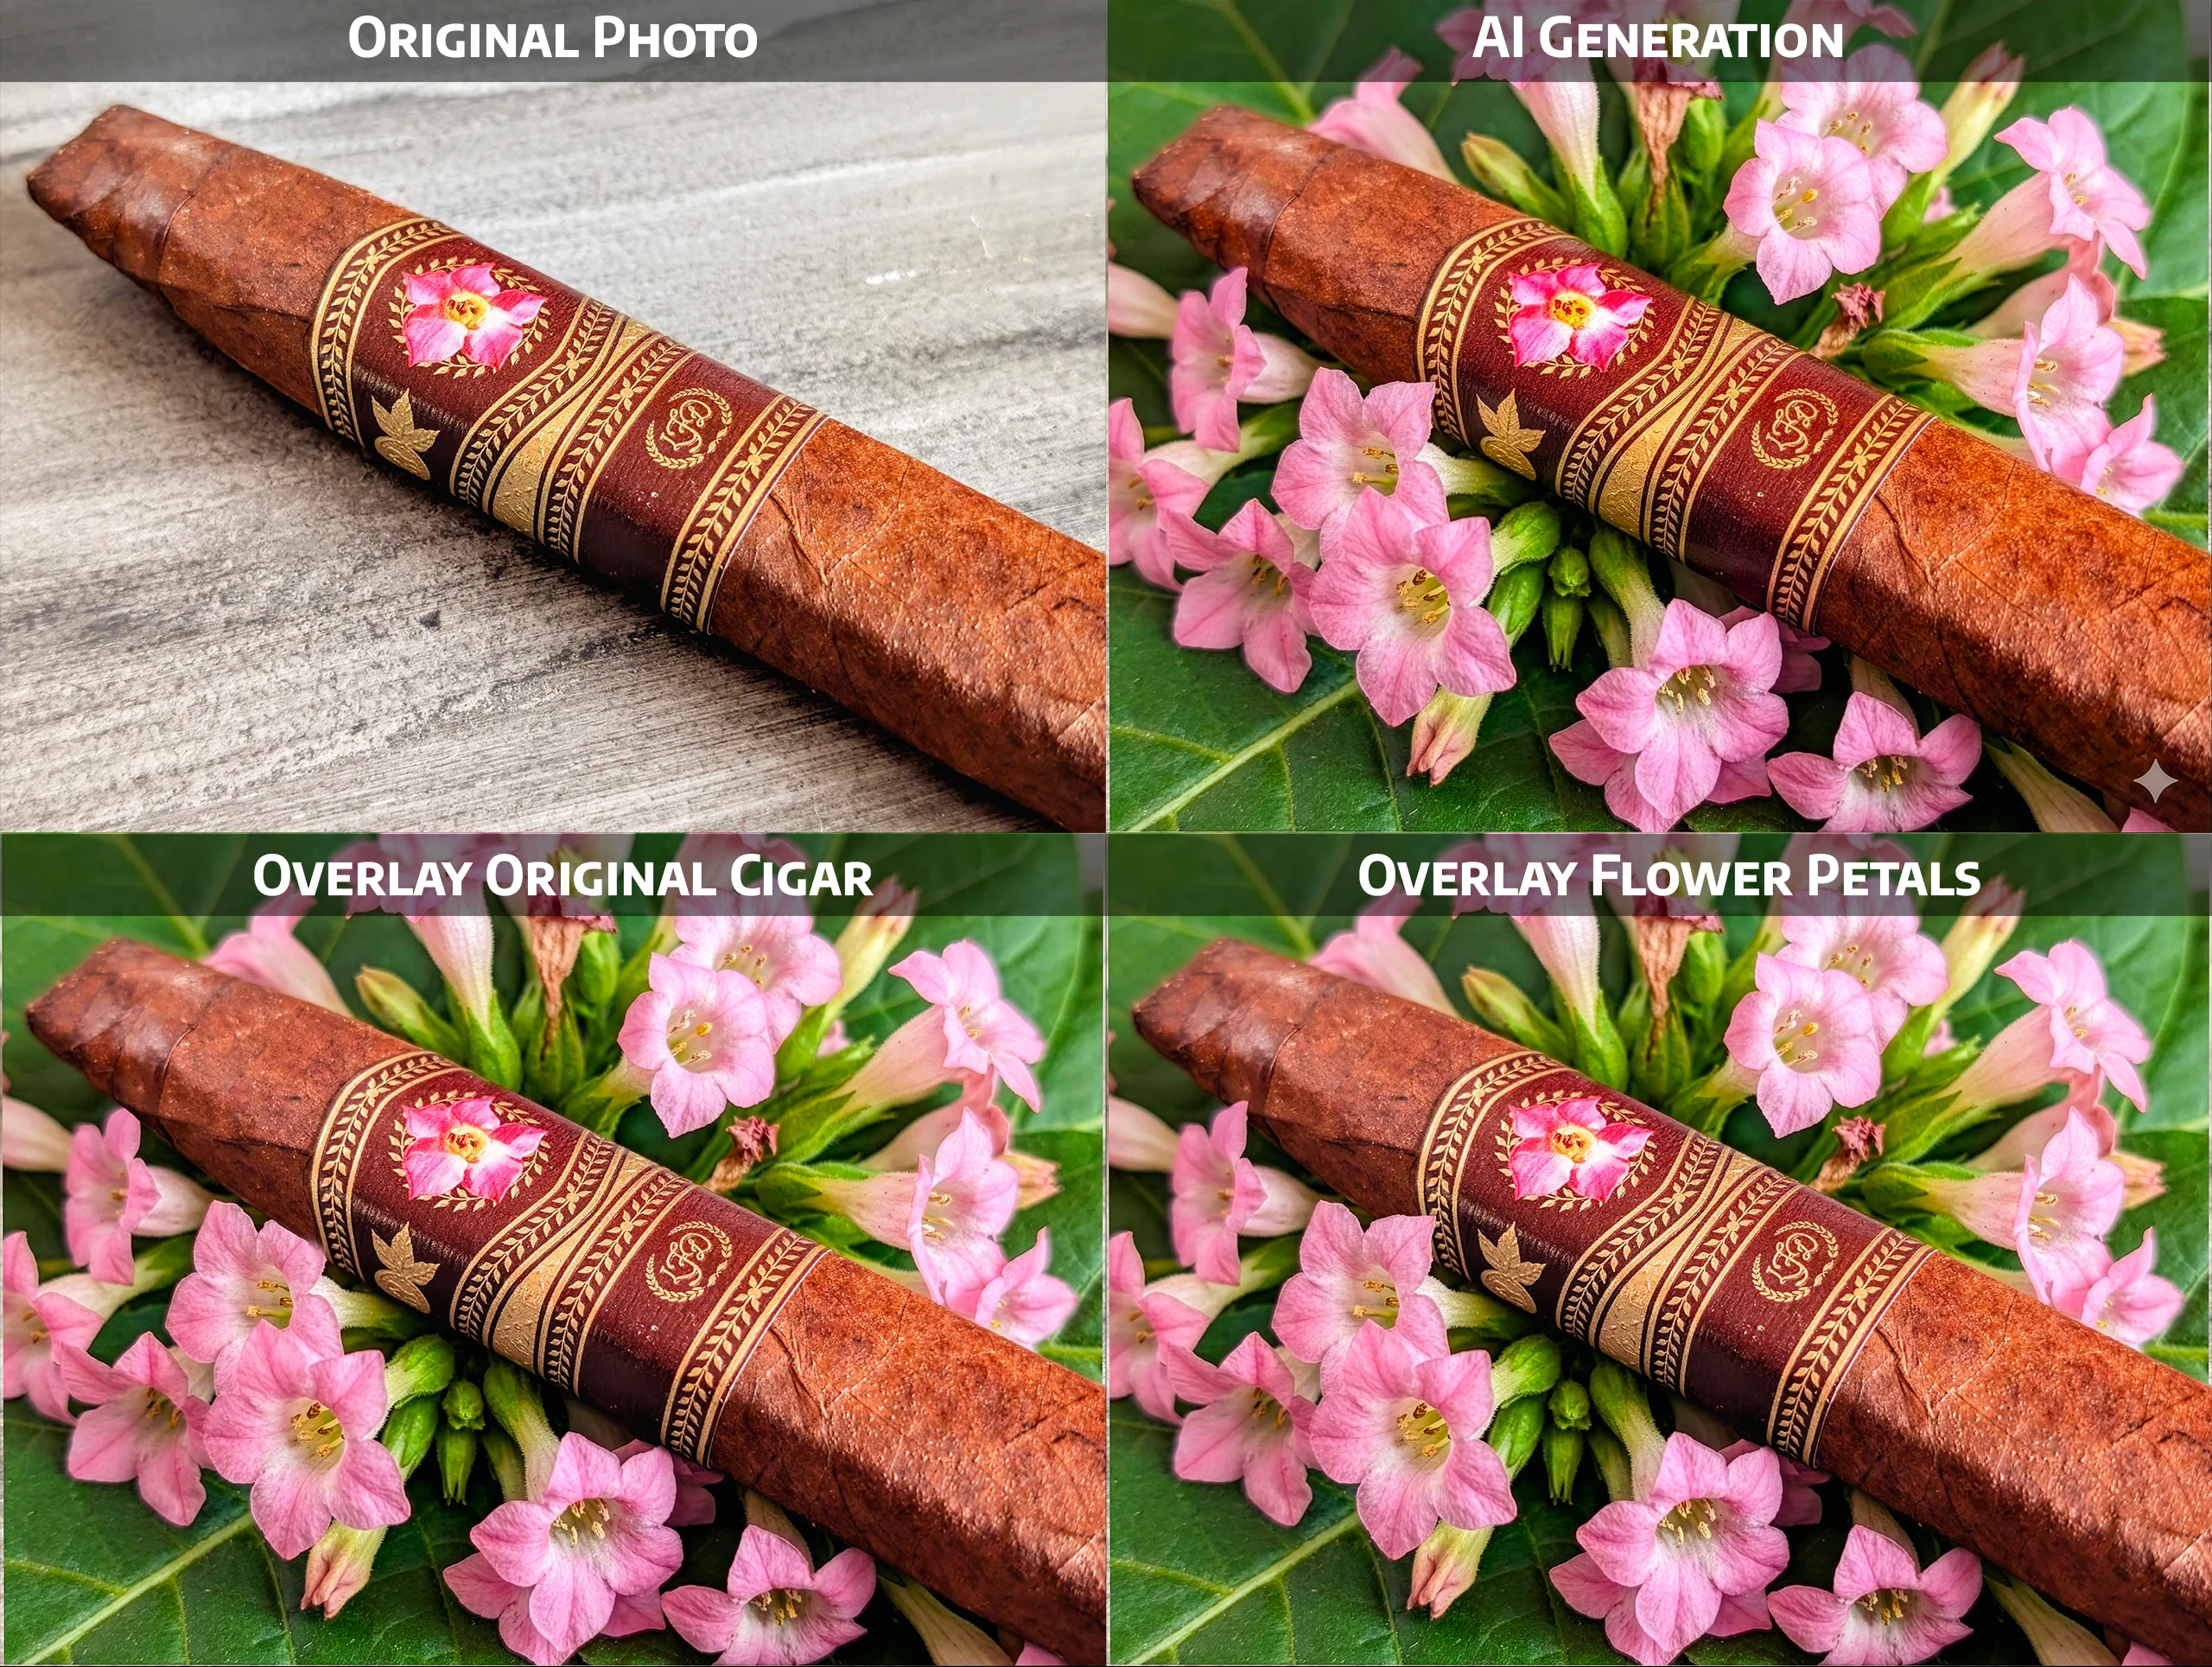
- LFD 30 Years: the top of a tobacco plant with flowers matching the ones on the band.
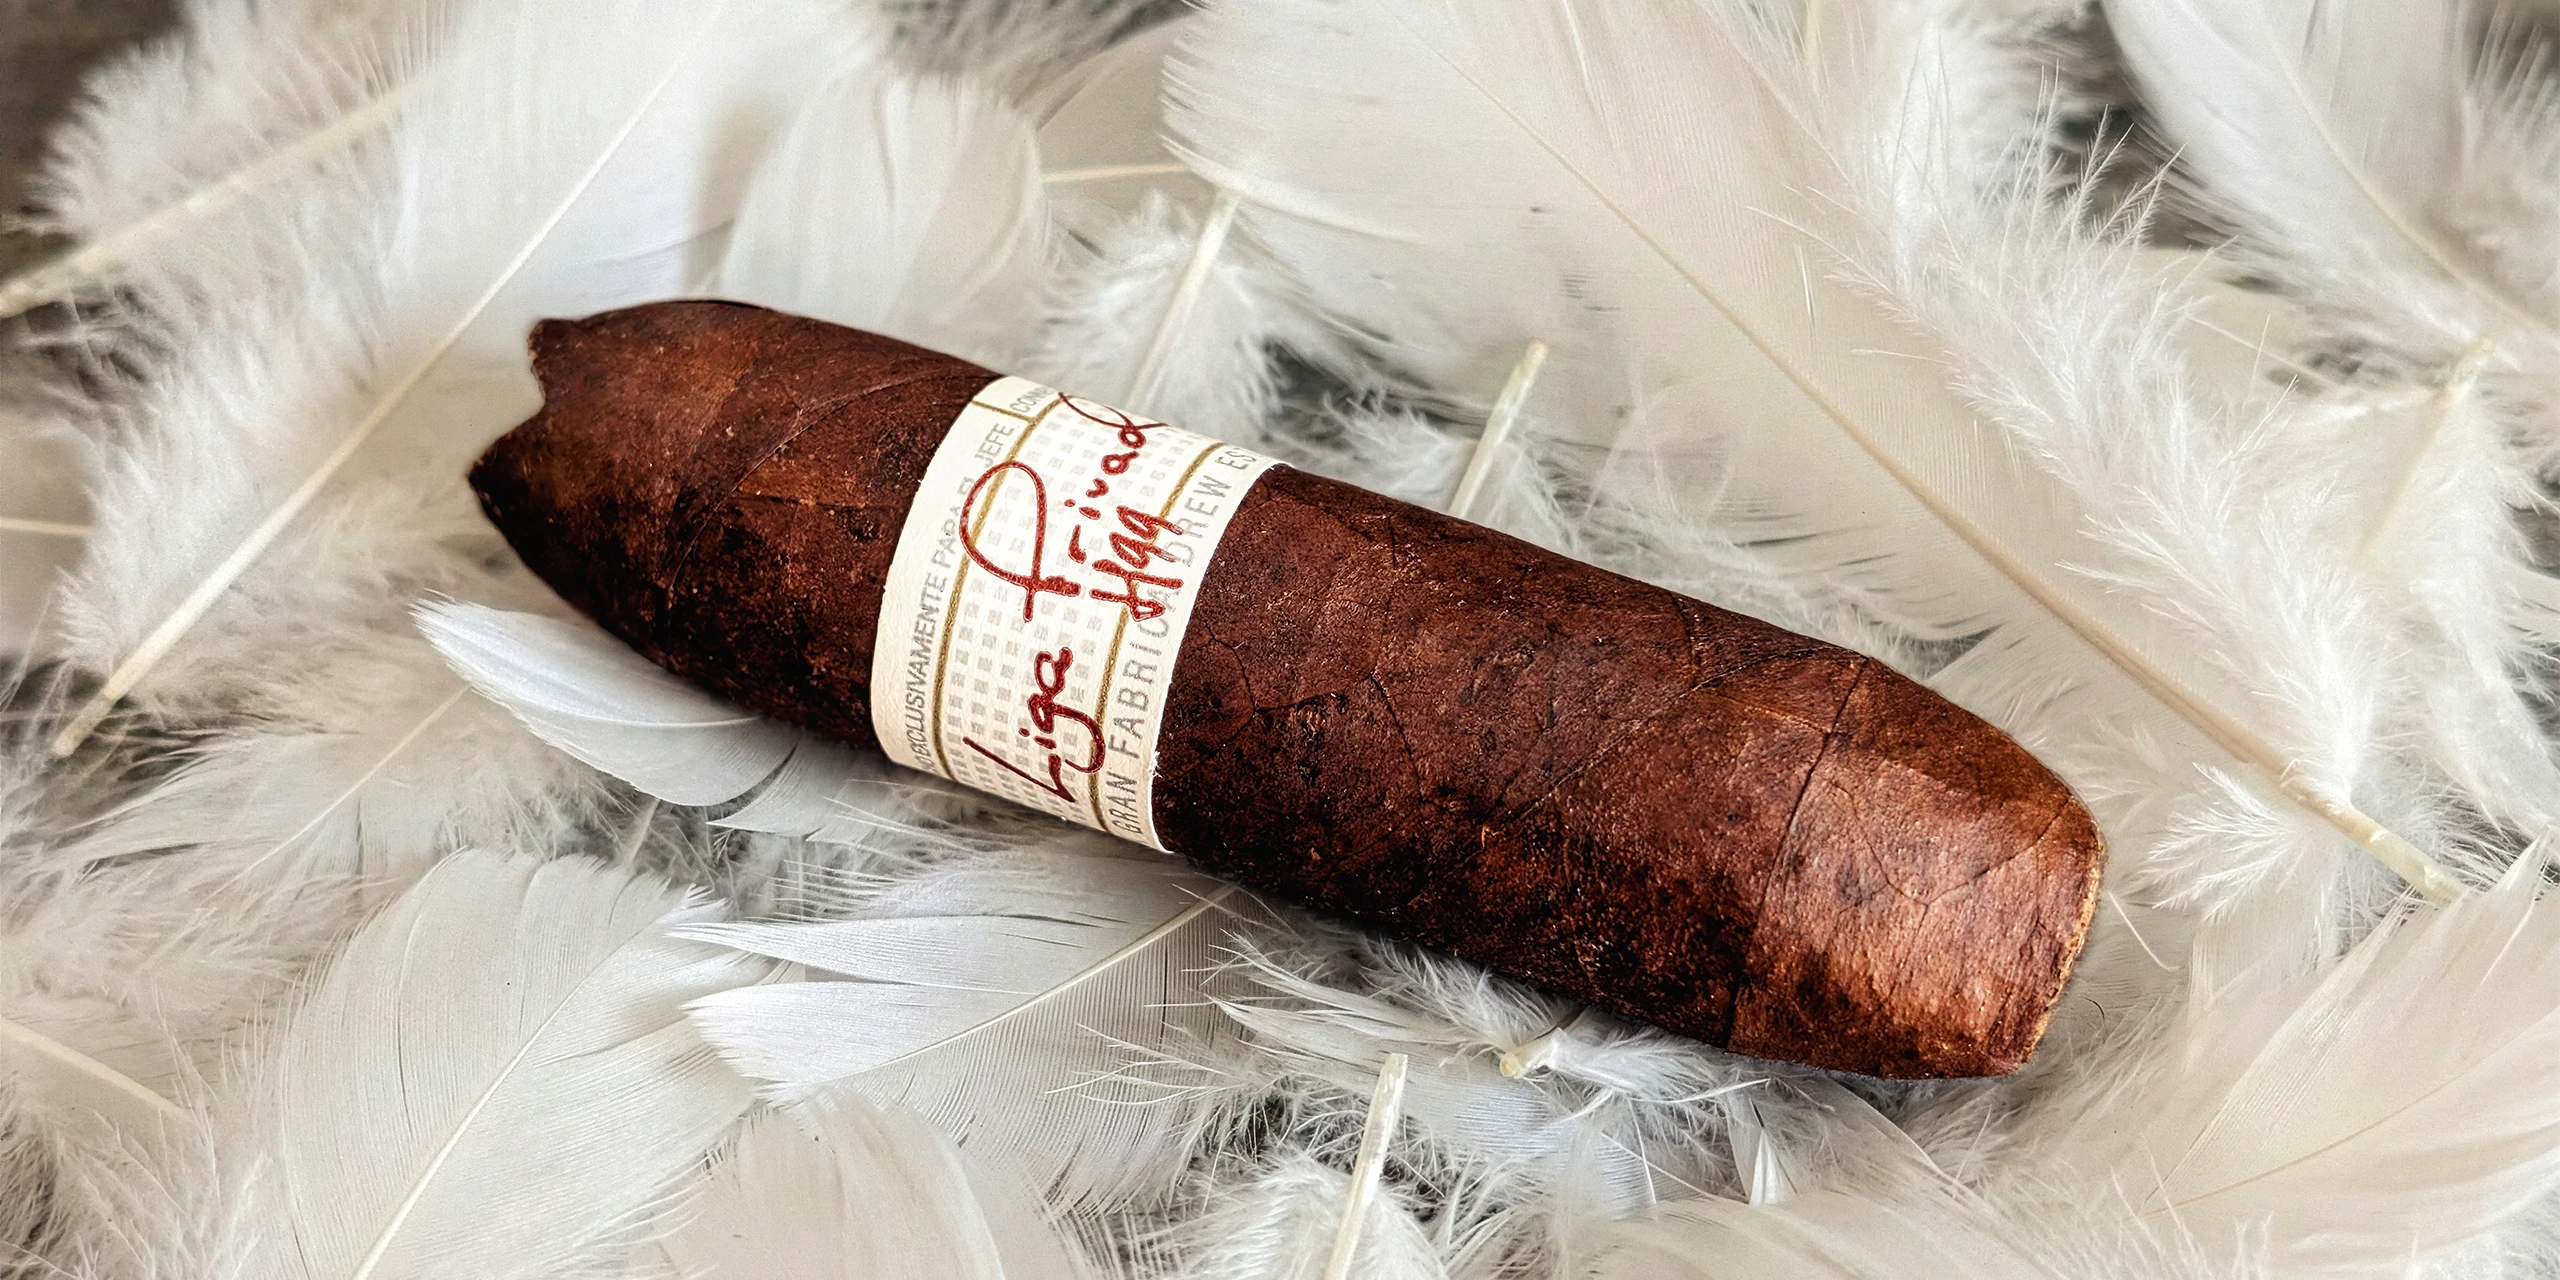
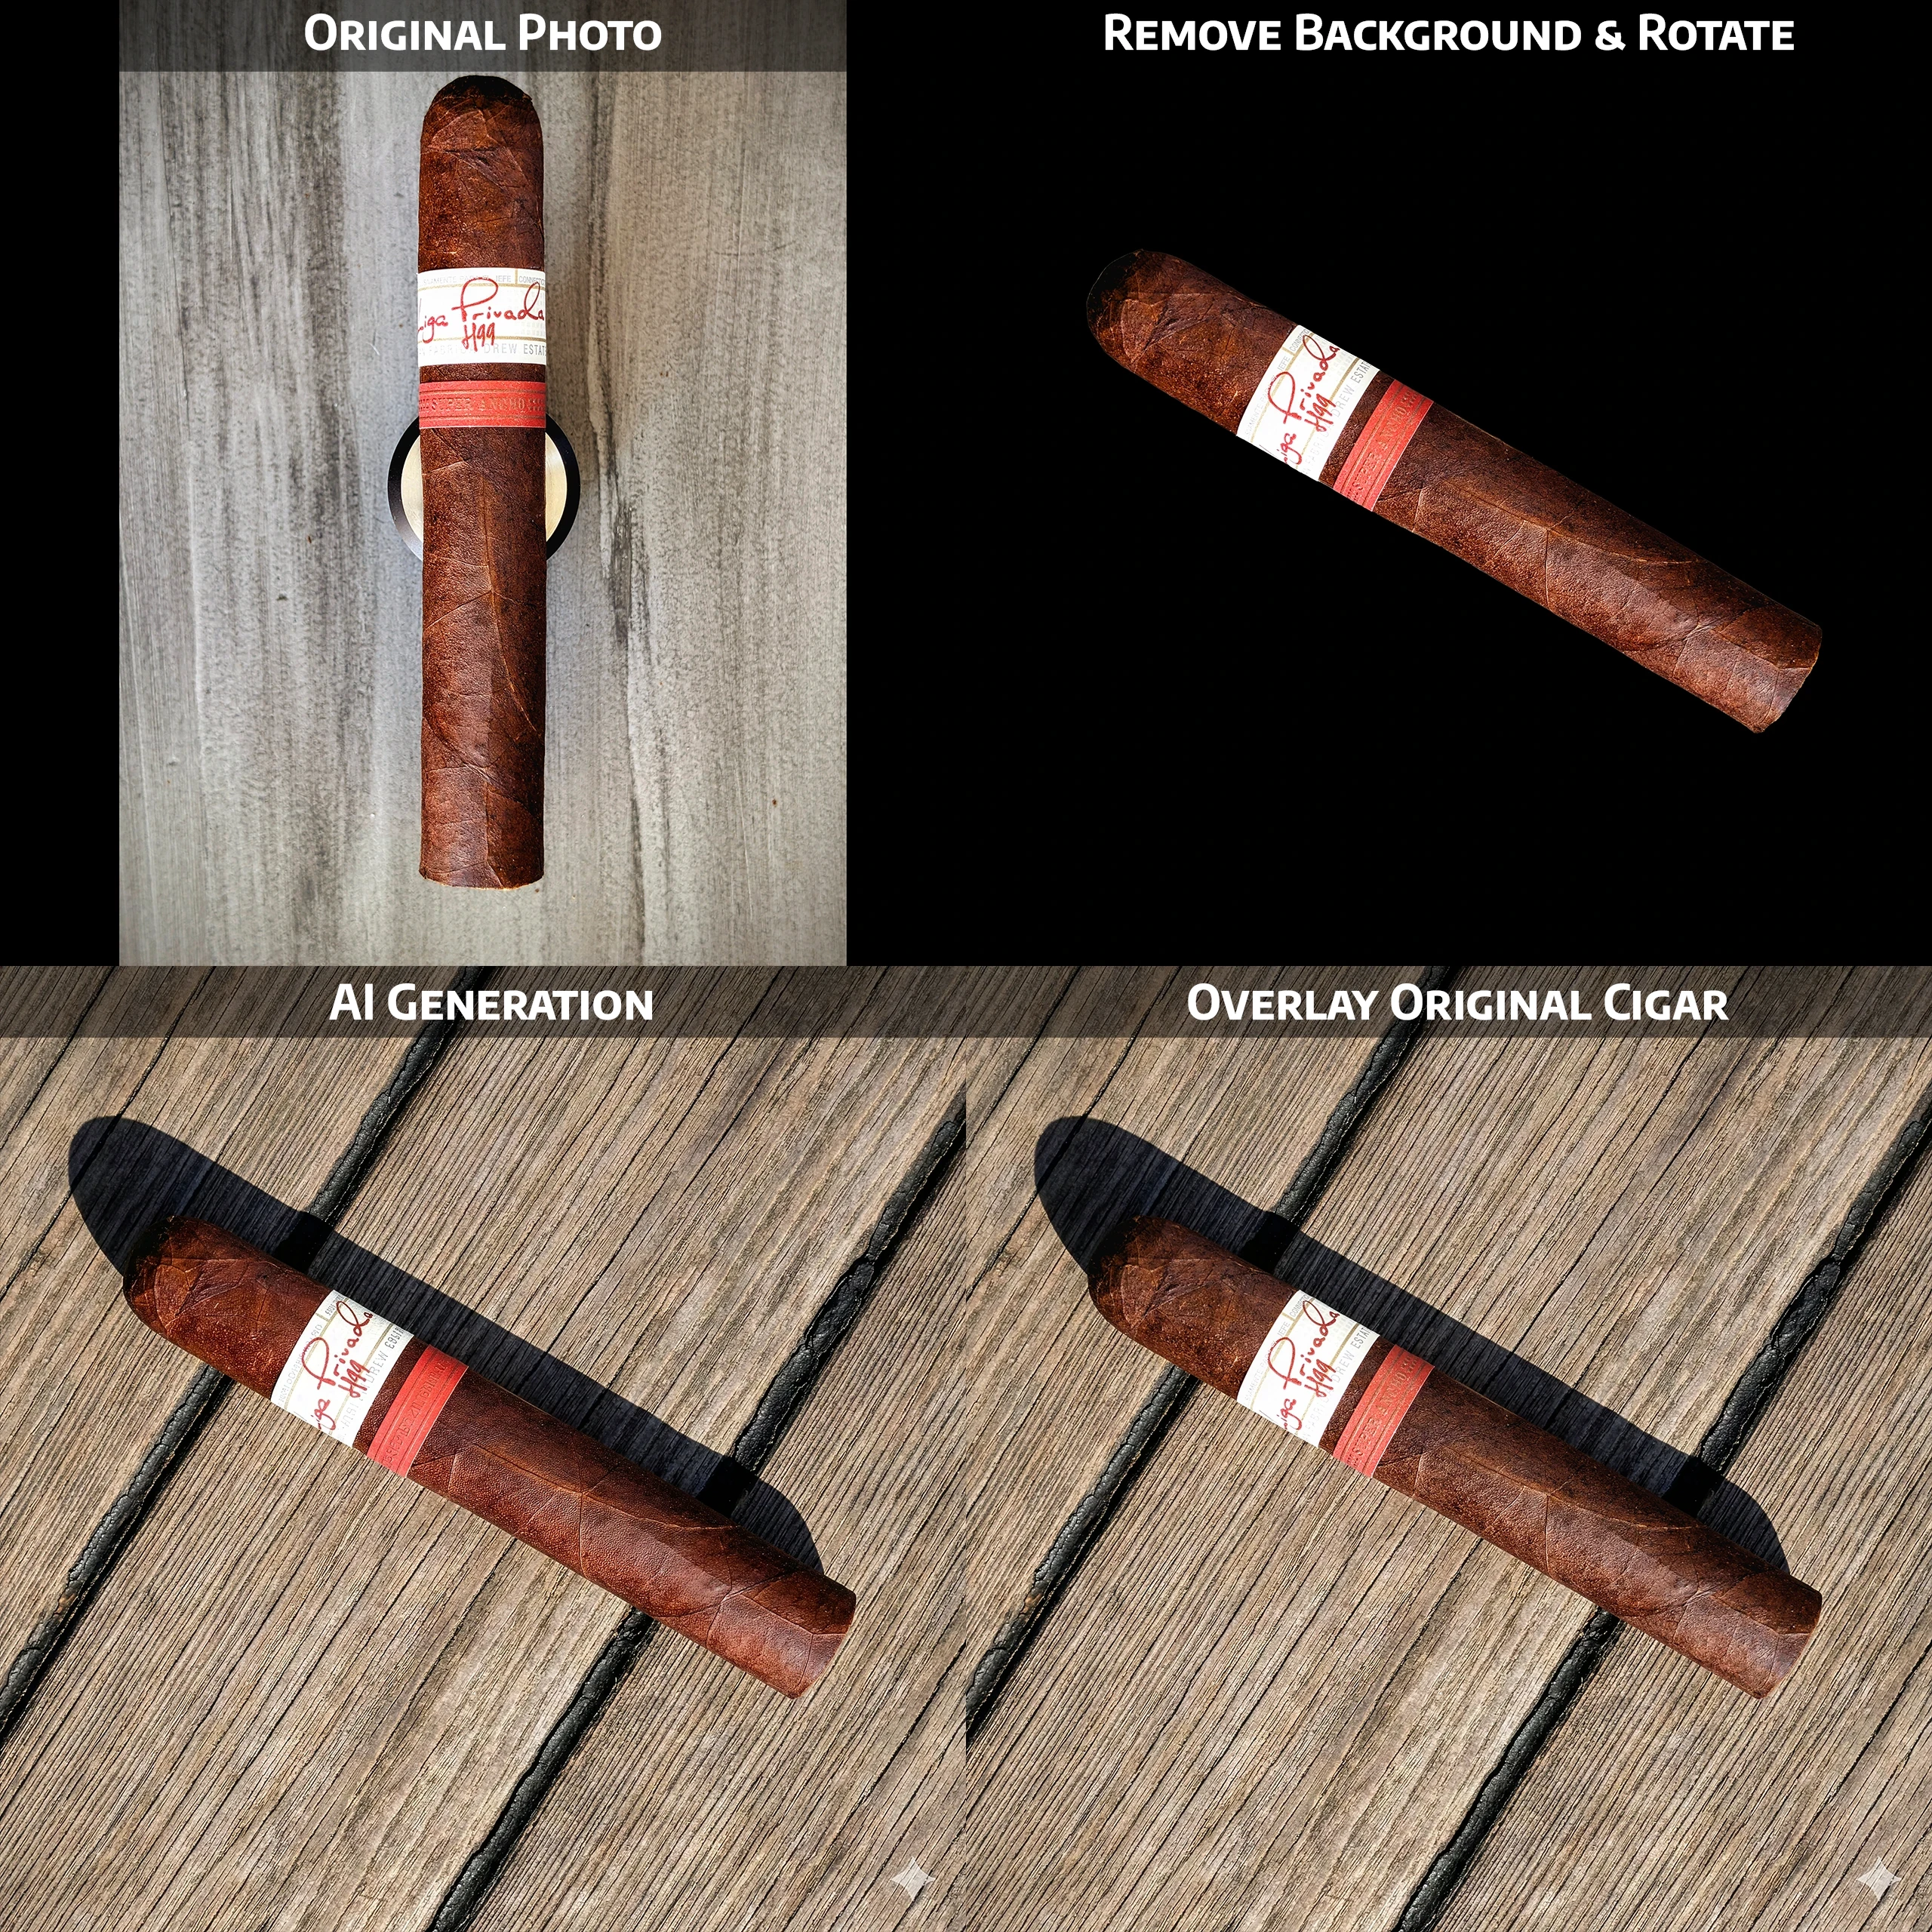
- Liga Privada H99: chicken feathers because that seemed appropriate for a flying pig.
- ChiMolly Pioneer: a map of feudal China
- Principle Engagement: rose petals as the figurines were part of the original photo.


But AI isn’t a quick fix.
One major headache is that, even with effective prompts, AI can’t help but modify the composition or framing of the cigar in some photos. Look at the Liga Privada H99 Flying Pig. AI was able to effectively place the distance shot on chicken feathers without changing the cigar, but it failed on the close-up. No matter how I tweaked the prompt that I’ve used on dozens of cigar photos, I couldn’t get the AI to stop changing the composition.

Another issue is that AI image-to-image generation can be highly destructive. You know how if you save a JPG multiple times, it loses quality, creates artifacts, and generally looks like shit due to compression? AI does something similar through “generation drift.” When AI processes an image, it is essentially re-interpreting and re-rendering the pixels. Even with a single prompt, it will often soften or reduce the crispness of your source image. If you run the same image through the AI multiple times without strictly masking off the areas you want to protect, it will lose quality, create visual artifacts, and effectively destroy the parts of the image that were supposed to be unchanged. Look at how these Ginger Ale cans are turned to garbage between the first prompt that generated the image and the additional prompts used to tweak it.

So, even with a single prompt that retains the original composition and layout, I still have additional work to do. Compare the source photos with the generated output.
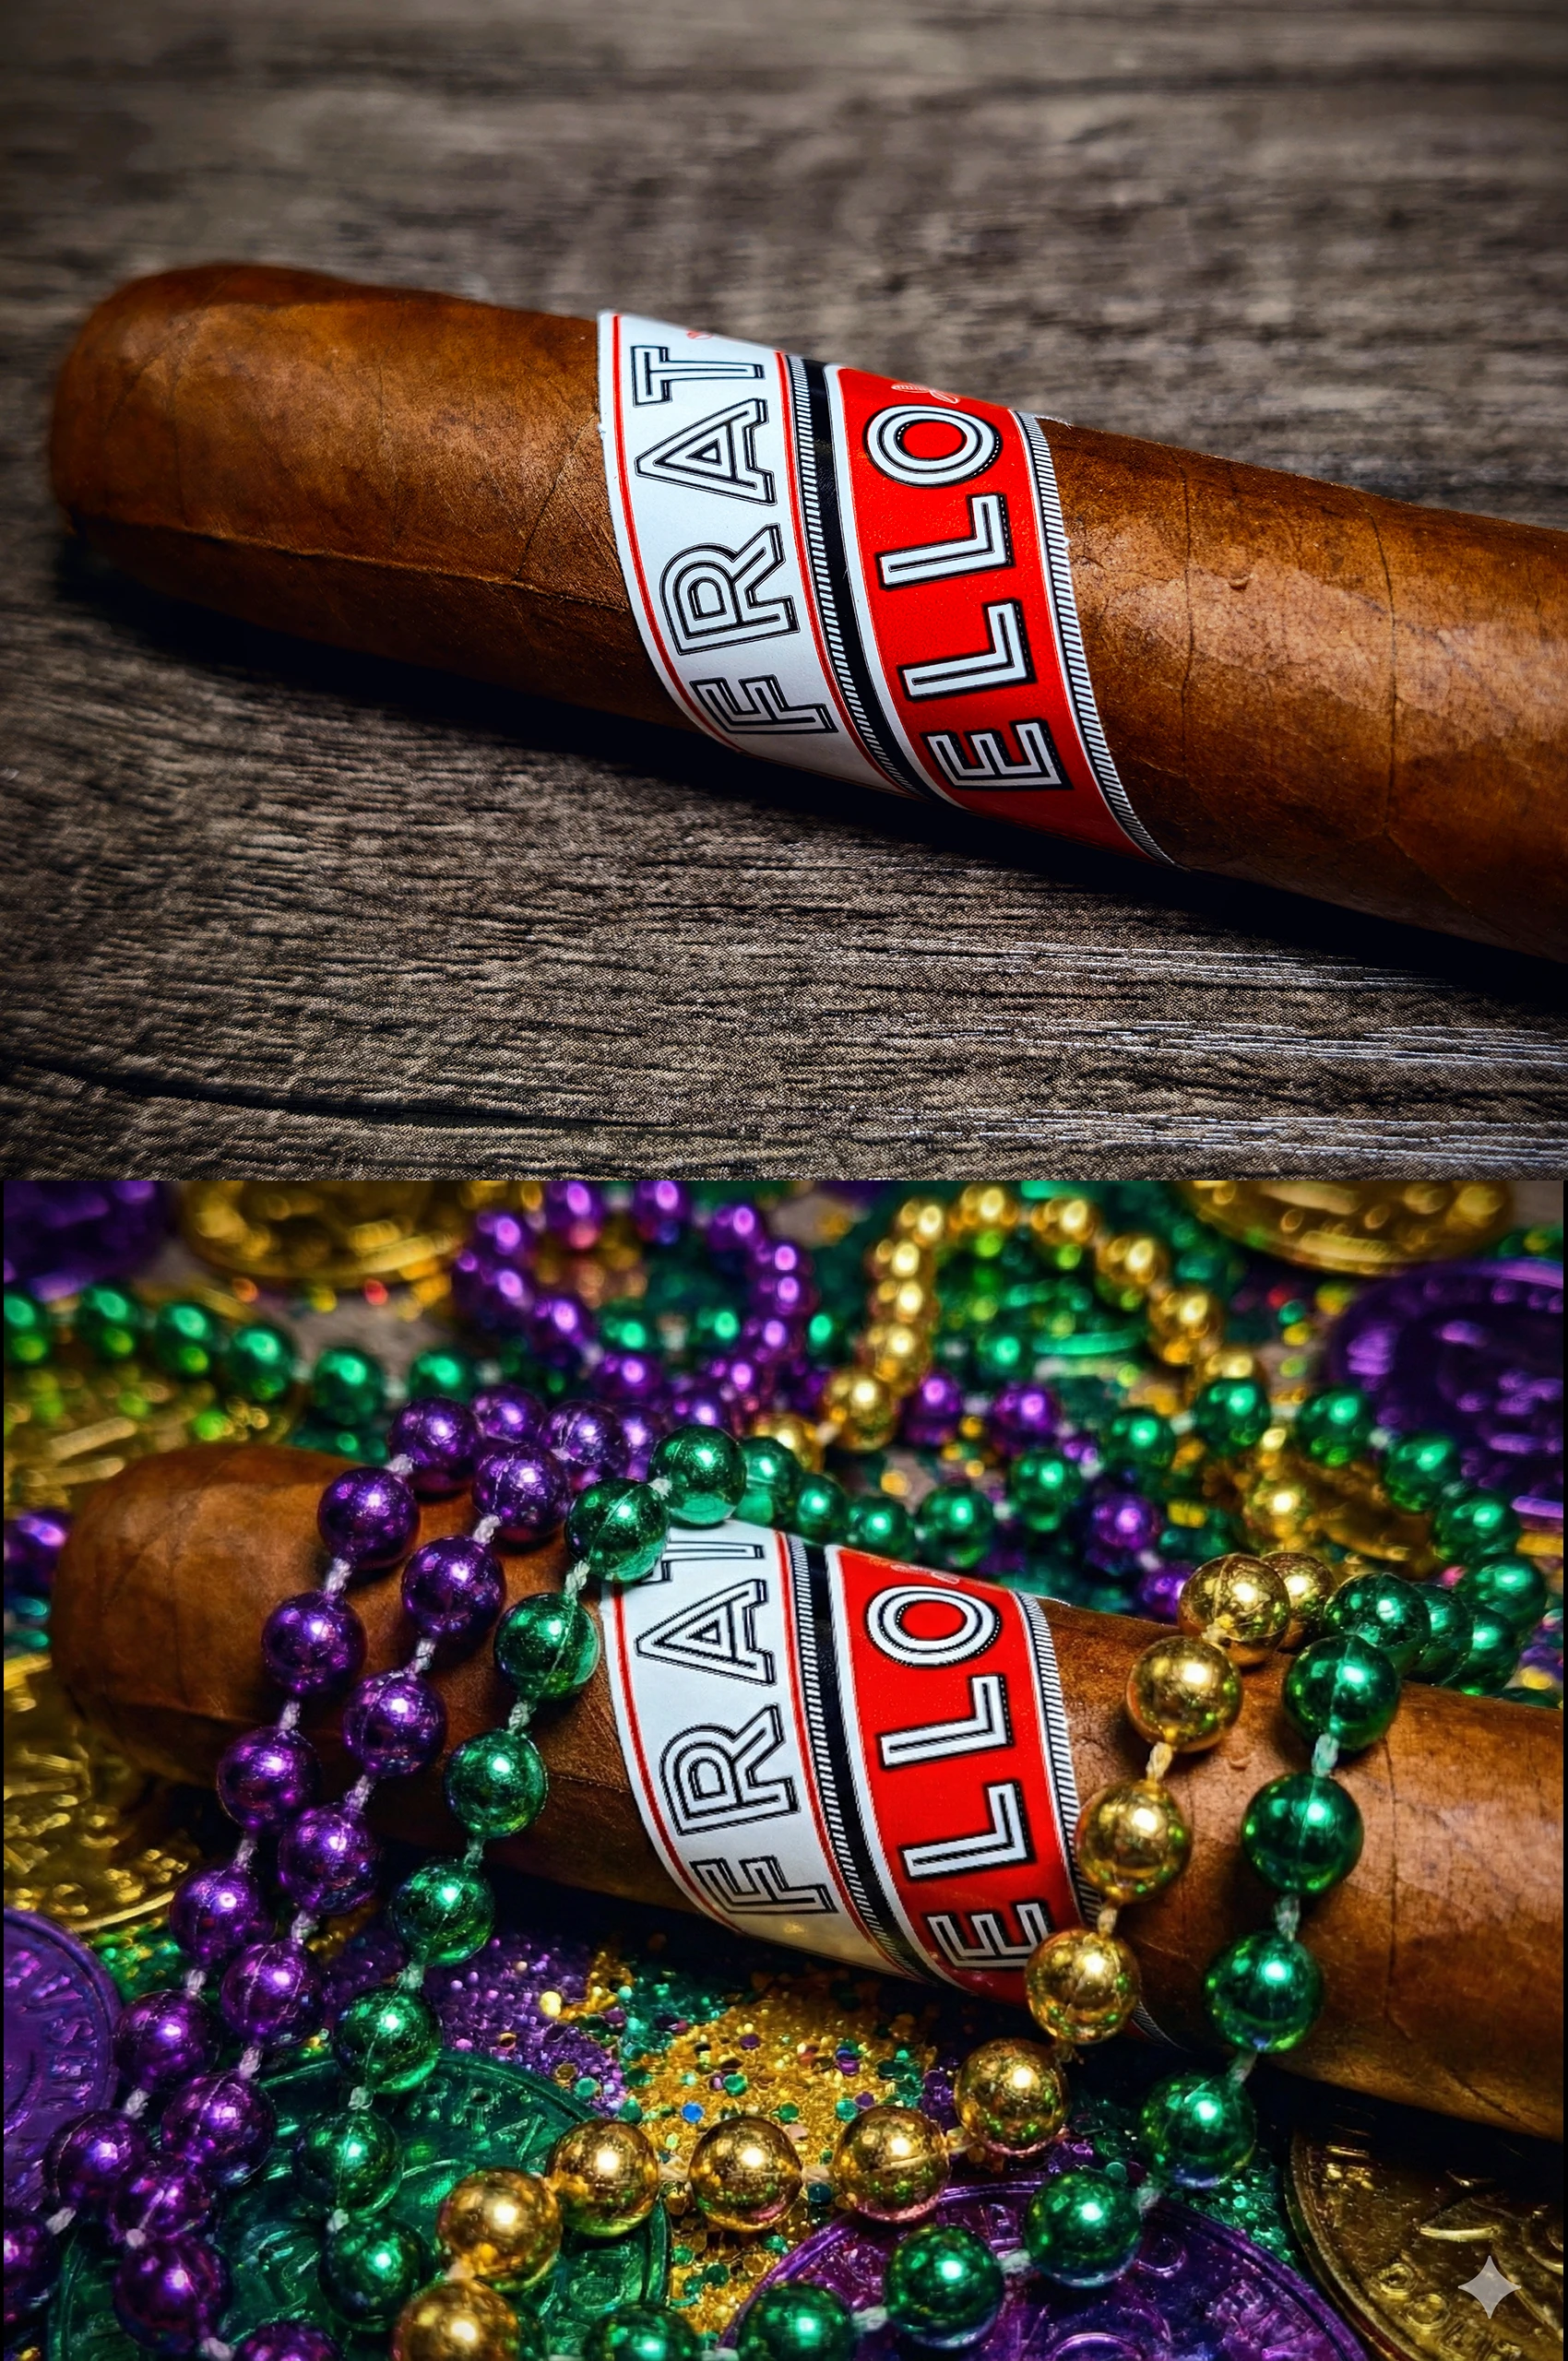
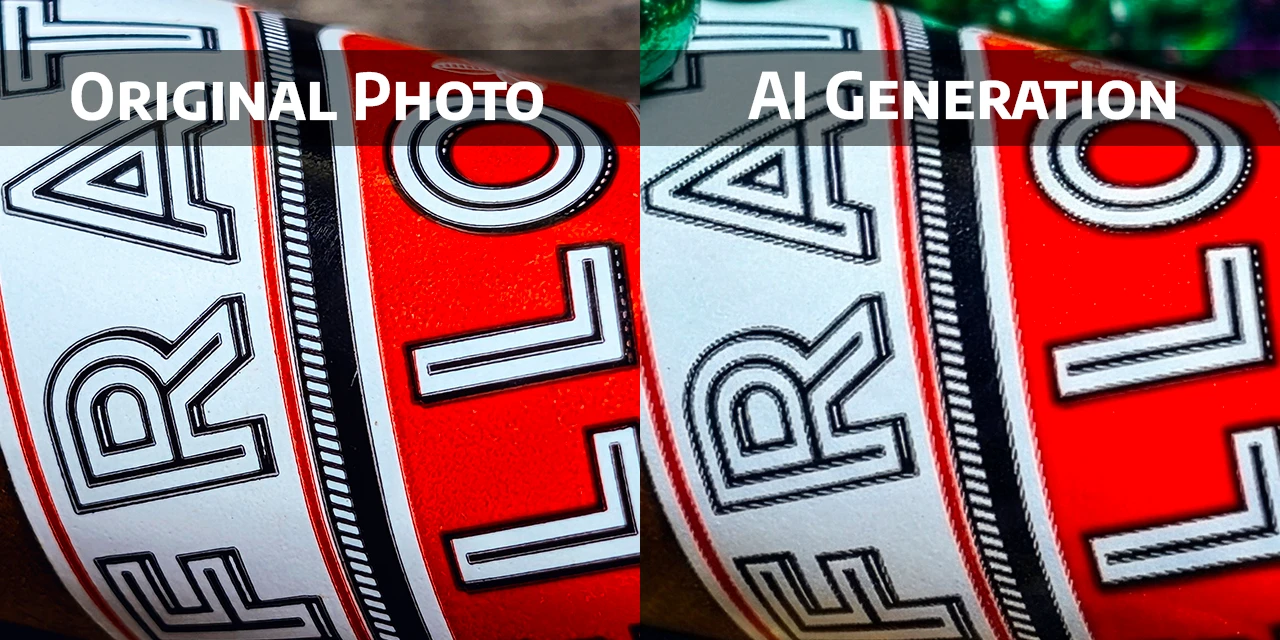
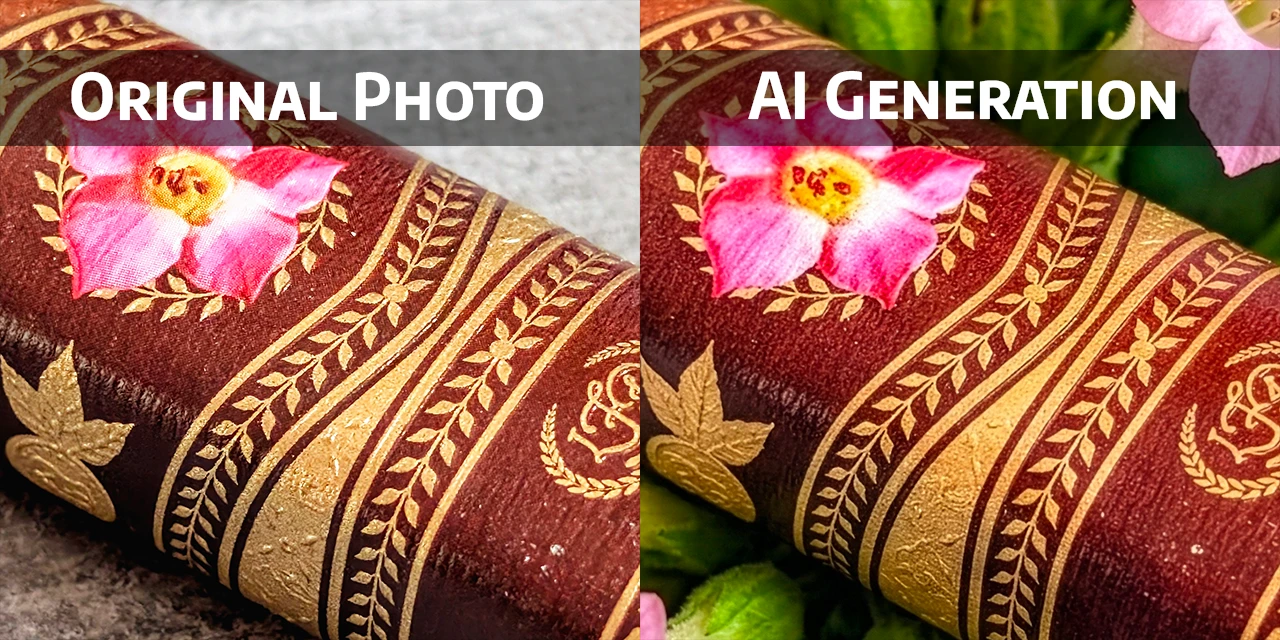
Further, if you want to see just how destructive AI can be on fine details with just a single prompt, look at the text labels on the Fratello Pelican and LFD 30th Anniversary.
You need additional tools to supplement AI.
Maybe you’re thinking, meh… it’s good enough for me. Bully for you, buddy. I have high standards, and it’s not good enough for me. So, I take my original photo, the AI-generated image, and combine the best of both worlds in Photoshop.
It usually follows this process:
- Generative Upscale the AI output. These photos are usually no more than 2500 pixels in either dimension.
- Scale down the original photo to match the upscaled AI image size. Now they’re both around 4500 to 5000 pixels.
- Align the two images, ensuring they match perfectly (though minimal adjustments are usually needed).
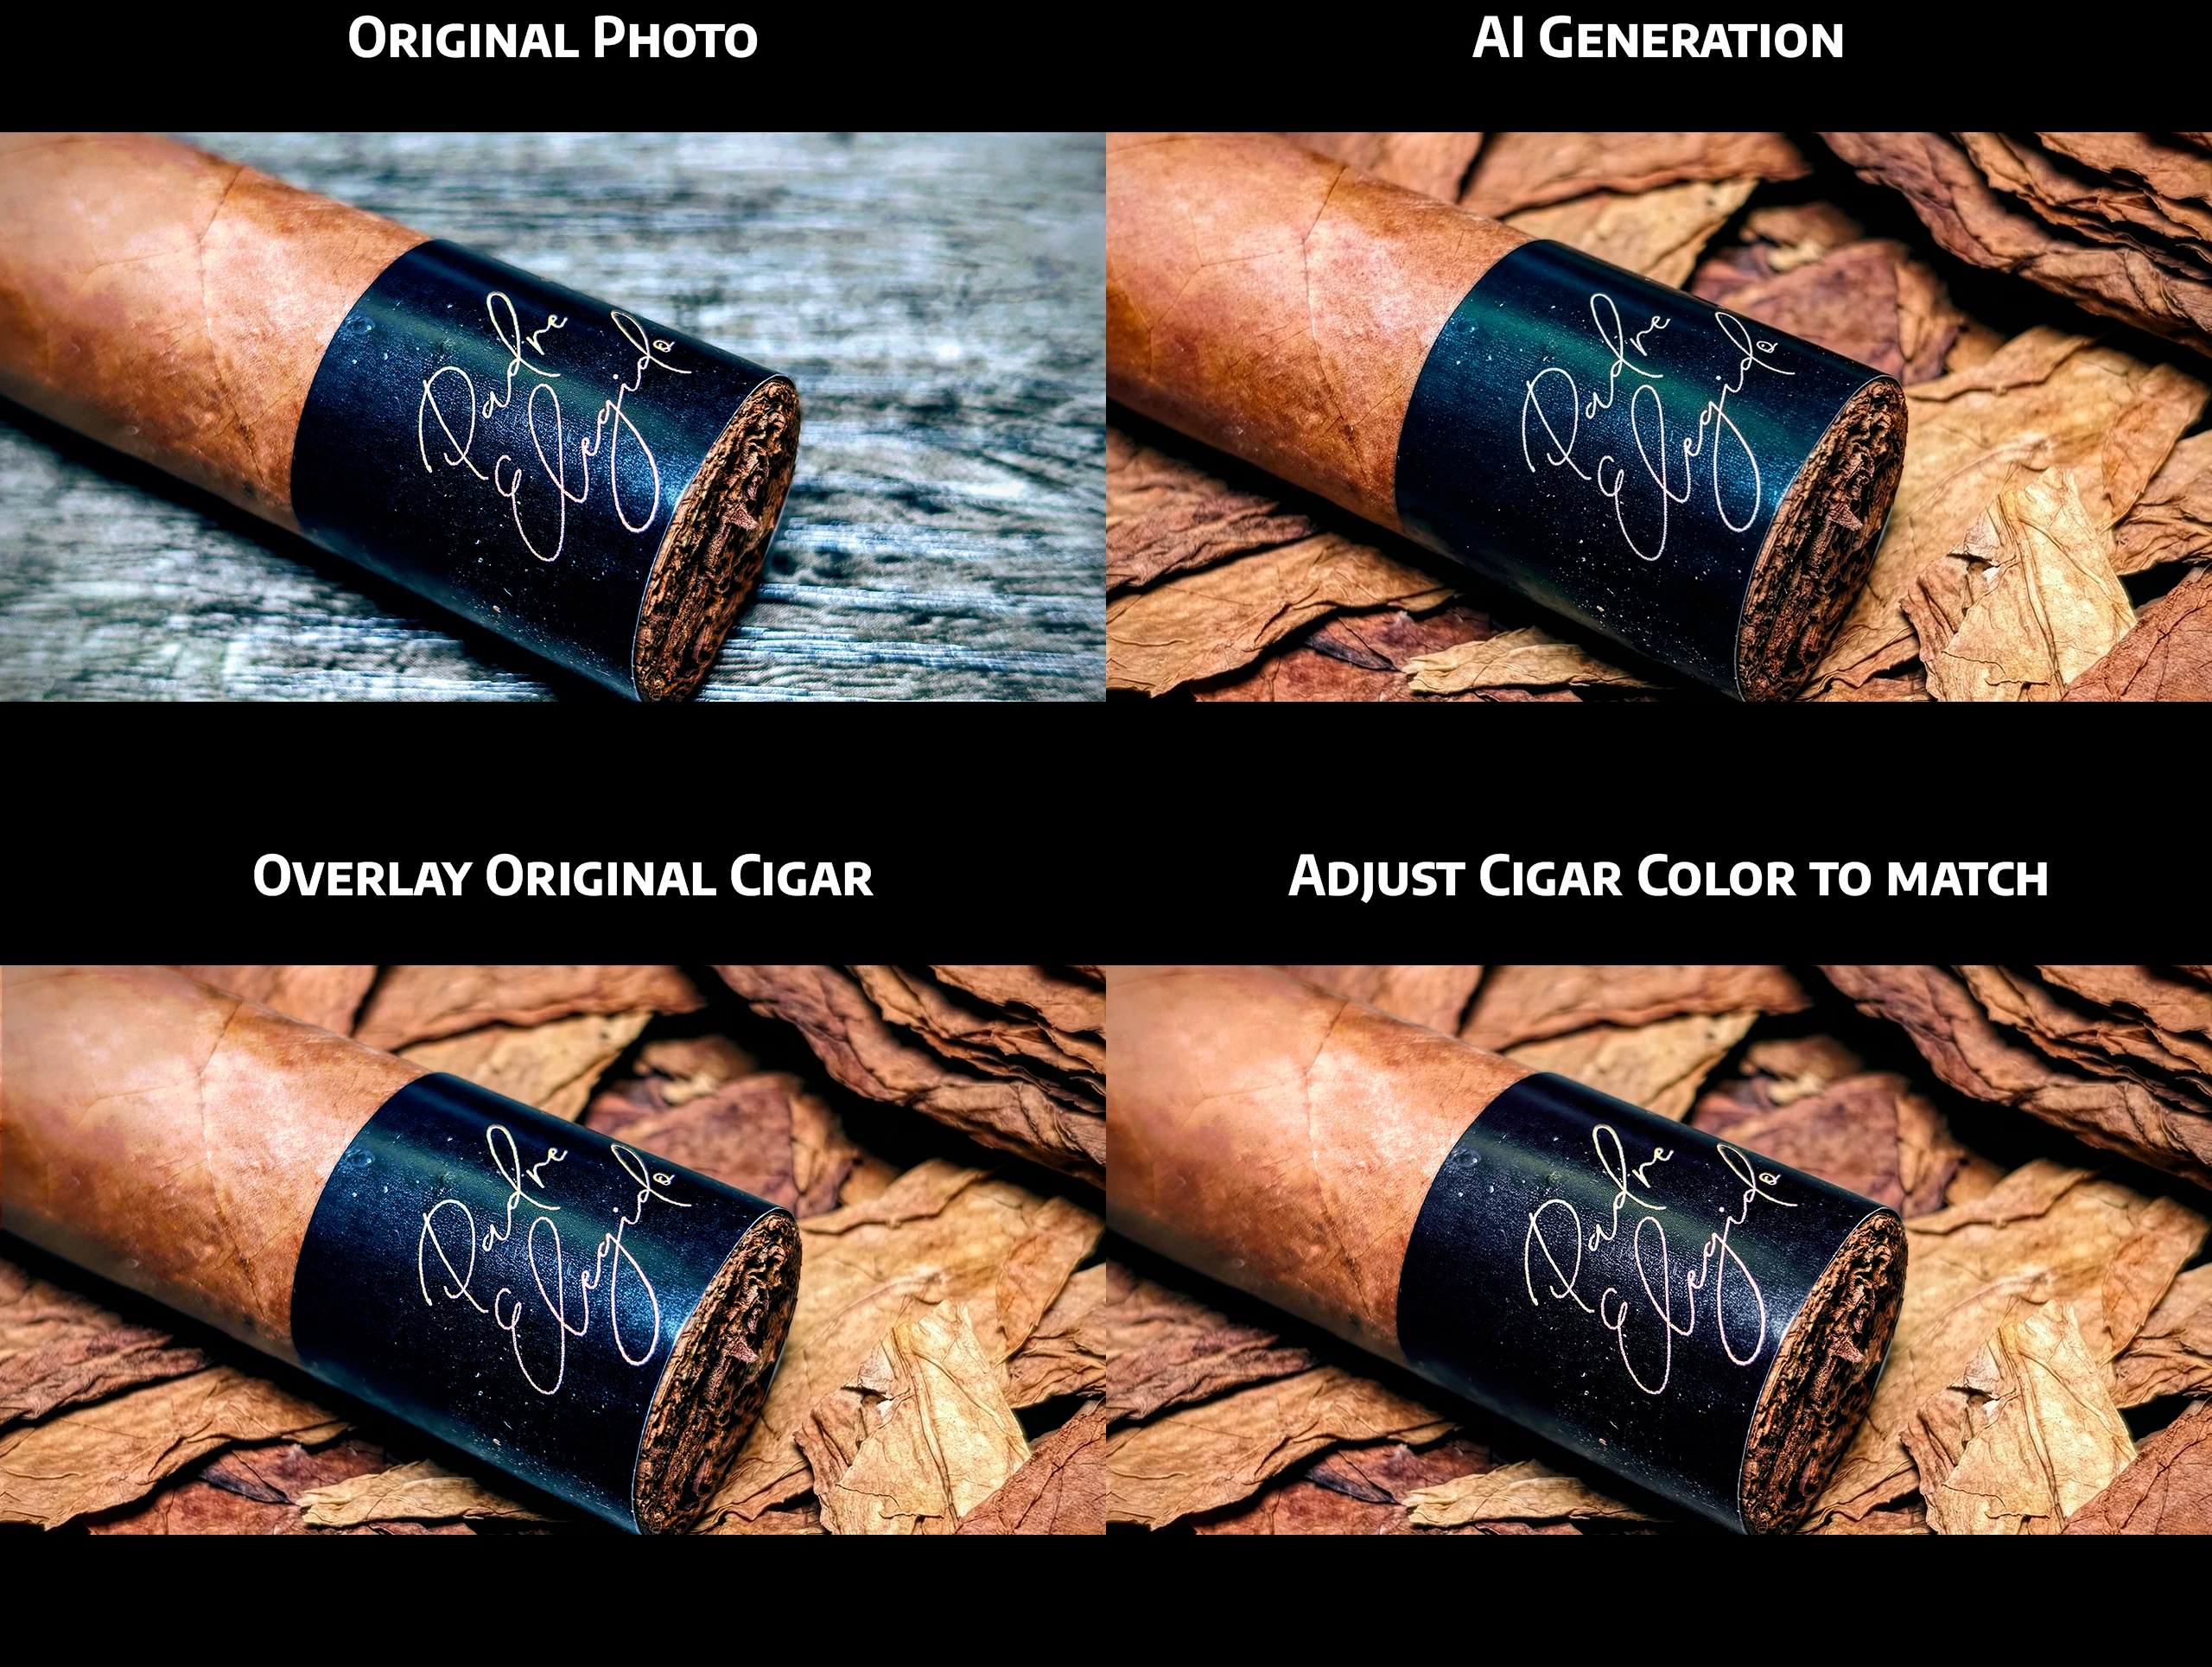
- Mask and copy the original cigar, pasting it over the AI cigar. Now the cigar is back to being the original, crisp photo, but the background is the AI-generated environment.
- Apply color filters or brightness/contrast adjustments to the original cigar to better match the lighting of the AI background if needed.
- Adjust and improve color, shadows, or other generation flaws in the AI background.
- Rebuild the foreground: If the AI image created an object meant to be in front of the cigar (like a flower or bead), I copy and paste those specific AI-generated objects back over the original cigar photo.
And about those non-cigar review articles…
You might have also noticed many of my non-cigar article header images use a comic book-style art. These are 100% AI-generated because honestly, AI is super effective at generating images in this style, and there’s no way I could illustrate these myself.
But touching on the topics above, you still need to avoid the multiple-prompt degradation issue. Even with the initial prompt, you can easily get hallucinated, garbage text in the image. In these cases, I use a secondary prompt that targets the gibberish text only, and then I will overlay those updated sections onto the original AI image to avoid the generation drift on the rest of the image.

In Closing…
AI is just another layer in my photo editing process. It takes the heavy lifting out of generating impossible backgrounds, but it still takes a human touch to make it look right. Don’t accept the slop, but don’t fear AI either.
Want to Comment?
Leave a comment on our Facebook page.